
Overview #
The Address Book contains data related to contacts, including specific distribution settings and custom parameters. Enabled user accounts that have Authentication Credentials are automatically listed as contacts in the Address Book. Contacts for users who do not need to log in to Reportworq, such as consumers of distributed reports, can be created, edited, or deleted directly in the Reportworq Address Book. Contacts can be reused for multiple jobs, which simplifies the configuration of distribution targets.
Contacts are also an optional component of Burst Sets, where a specific contact can be assigned to a portion of the parameter iterations of a job. All contact details, such as Name, Distribution channels, and custom fields can be used as Variable Values in the Distribution section of the Job Editor.
You can add custom fields to the Address Book to store additional contact-specific data that can be referenced by Distribution Jobs and Contribution Campaigns as Address Book variables. You can also use custom fields in contact mappings to designate recipients for report Distribution or Contributors and/or Approvers for Contribution input forms.
To access the Address Book:
- On the left toolbar, select the Address Book icon.

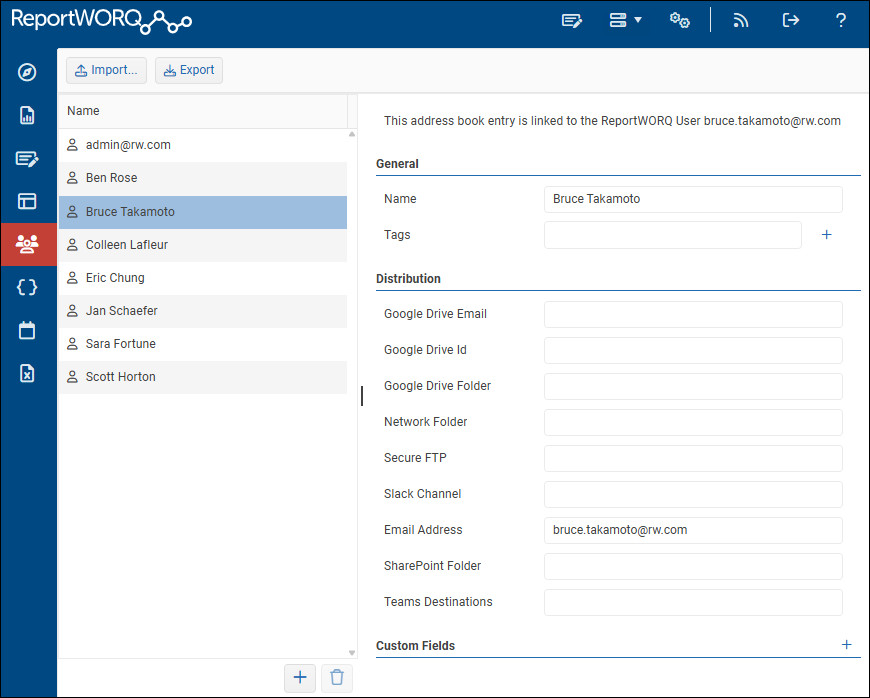
- The Address Book interface appears.
Creating a Contact #
Contacts for users who do not need to log in to Reportworq can be created, edited, or deleted directly in the Reportworq Address Book.
Note: Contacts created directly in the Address Book do not acquire any Reportworq entitlements (licenses). They can only be designated as recipients for report Distribution, in the Job editor. Reportworq licenses can be assigned only to accounts that have been added in the Authentication interface.
To create a new contact:
- At the bottom of the list of contacts, select the plus sign icon.

The New Contact dialog appears. - Provide a name for the contact, and then select OK.
Note: Each contact must have a unique name. - The contact is created and appears in the list.
Provide contact details as required.
To delete a contact:
- Select the contact.
- Above the contact details area, verify that there is no message indicating that the contact is
linked to a Reportworq user.
You cannot delete Address Book contacts that are linked to Reportworq user accounts. To remove them from the Address Book, disable or delete them from the Authentication interface. - At the bottom of the list of contacts, select the delete icon.

The Delete Contact dialog appears. - Select OK.
The contact is deleted.
Distribution #
Each contact can be assigned a target distribution location for any configured distributor. Distribution values can be used in Burst Sets and are available through the Contact Variable on the Job Editor’s Distribution step. If a Distributor is not visible, it needs to be configured before it can be used in the Address Book. Distribution values are free-form text. However, they need to be valid for the associated Distributor to avoid errors during a job run.
| Distributor | Example |
| Email Address | user@mycompany.com |
| Network Folder | ‘\MyServer\MyFolder’ or ‘c:\Reports\UserReports’ |
| Google Drive Email | user@myworkspace.com |
| Google Drive Folder | MyFolder\UserFolder |
| SharePoint Folder | https://myofficeserver.sharepoint.com/sites/mysite/myfolder1/myfolder2 |
| Slack Channel | general |
| Teams Email | user@myteamsaddress.com |
Custom Fields #
Custom fields enable you to provide contact-specific information to Distribution Jobs and Contribution Campaigns. This could include any data you might want to include in a Distribution message or a Contribution notification. You can insert information from custom fields into Jobs and Campaigns by selecting them as Address Book variables.
Custom fields are also used to configure contact mapping.

To create and populate a custom field:
- At the top of the Custom Fields area, select the add icon
 and then provide a Custom Field Name.
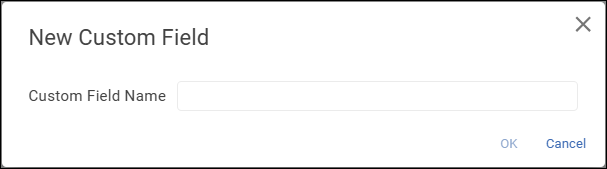
The custom field appears on the list. - Enter data in the custom field for at least one contact immediately to ensure the custom field is saved.
You can enter or update custom field data for any or all contacts anytime, as required.
Tip: Entering custom field data in a spreadsheet may be more efficient than entering it for each contact individually. You can export Address Book data as an .xlsx file, edit it, and then import it.
Contact Mapping #
Contact mapping dynamically looks up information about contacts in the Address Book. The information can be incorporated into Reportworq Distribution Jobs and Contribution Campaigns.
This section contains two topics:
- Contact Mapping for Distribution Jobs — You can use contact mapping to specify which contacts from the Address Book receive Job output.
- Contact Mapping for Contribution Campaigns — You can use contact mapping to assign input forms to Contributors and/or Approvers.
Contact Mapping for Distribution Jobs #
Contact mapping establishes a correlation between a field from the Address Book (Mapping Field) and a defined value (Mapping Value) that may contain text, variables, or a combination of both. When the Job runs, the value from each contact’s mapped field is compared to the current mapping value to determine whether the contact receives Job output.
A custom field is often used as the Mapping Field. For example, if you are preparing a Job that bursts based on a parameter named Sales Region, you might select that parameter as the Mapping Value and create a custom field with a name related to it such as Managed Region. For each contact who is a regional sales manager, you would define the value of their Managed Region custom field to reflect the name of their region, ensuring that it matches a possible value of the Sales Region parameter exactly. There must be at least one contact match for each parameter value. When the Job runs, each regional sales manager receives an iteration of the Job output containing data for their sales region only.
Note: If a Distribution Job includes a Linked PowerPoint presentation, recipients cannot use the PowerPoint features of the Reportworq Add-in for Microsoft Office unless they possess the PowerPoint End User entitlement and have access to the Reportworq Workspace where the Job resides. For more information, see Managing User Accounts and Assigning Licenses.
To configure contact mapping for a Distribution Job:
- If the Job includes burst sets, in the Bursting step, remove all contacts.
- In the Distribution step, open the Job Options pane and select Associate Contact with mapping.
The Mapping Field and Mapping Value settings appear.
- For Mapping Field, select the appropriate Address Book field from the list.
The value of this field for each contact in the Address Book will be compared to the Mapping
Value to determine which contacts receive Job output.
Tip: If the custom field name is not on the list, refresh your browser to update the list. - For Mapping Value, define the value to be matched:

- If the Job includes burst sets, the Mapping Value must be based on a burst-enabled
parameter configured to create one report per item. - You can use text, variables, or a combination of both to define the Mapping Value.
- If you want to use a variable in the Mapping Value definition:
- Select a variable type from the list.
- A red variable pill appears. The text on the pill varies based on the type of variable you selected.

- Select the pill, define the specific variable, and then select OK.
In the following example, a parameter named Sales Region is selected.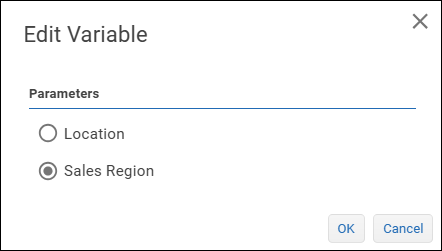
- If the Job includes burst sets, the Mapping Value must be based on a burst-enabled
- Close the Job Options pane.
Contact Mapping for Contribution Campaigns #
Contact mapping establishes a correlation between a field from the Address Book (mapping field) and a burst-enabled parameter configured to create one report per item. When each iteration of the Contribution input form is generated, the value from each contact’s mapped field is compared to the current mapping value to determine whether the contact receives access to that form.
Custom fields are often used as mapping fields. For example, if you are preparing a Campaign that bursts based on a parameter named Region, so that one iteration of the input form is generated per region, you might create a custom field named Region Managed to identify contacts as Contributors for the forms. For each contact who is to be a Contributor, you would define the value of their Region Managed custom field to reflect the name of their region, ensuring that it matches a possible value of the Region parameter exactly. When the forms are generated, each Contributor receives access to the correct input form for their assigned region.
When defining contact mappings for a Campaign:
- Contacts must be defined for all forms. Each form requires at least one Contributor, and if approval of submitted forms is required, at least one Approver.
- All Campaign participants must have the Contribution End User entitlement and access to the workspace that contains the Campaign. For more information, see Managing User Accounts and Assigning Licenses.
To configure contact mapping for a Contribution Campaign, using custom fields:
- In the Address Book, create a custom field for each of the types of participants you want to map (Contributors and/or Approvers).
For each custom field you create, enter data for at least one contact immediately to ensure the custom field is saved.
- Create and configure the Campaign, including burst sets.
- On the Create Forms tab, select the Parameters subtab and note which parameter is set to Burst: One report per item mode.
For the purposes of this procedure, this parameter will be referred to as the burst parameter. - On the Bursting subtab, delete contacts for all burst sets.
- On the Options subtab, ensure that the File Name includes a variable so the name of each bursted form will be unique.
- Do the following for each type of mapping you want to configure (Contributor and/or Approver):
- In the appropriate area (Contributor Contact Mapping or Approver Contact Mapping), select Associate Contact with a mapping.
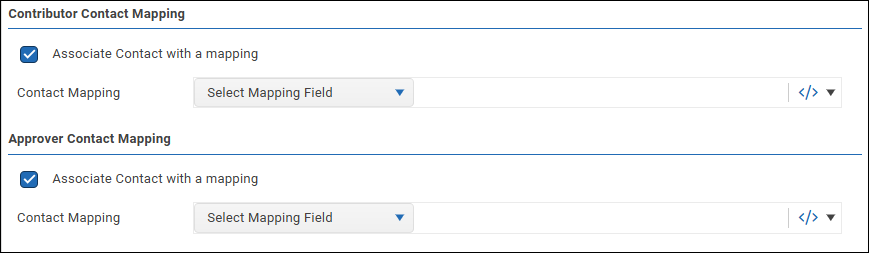
- Expand the Select Mapping Field list and then select the custom field you created for the mapping.
The value of this field for each contact in the Address Book will be compared to the mapping value to determine which forms are made available to that contact.
Tip: If the custom field name is not on the list, refresh your browser to update the list.
- From the dropdown list, select Parameter.
A red Select Parameter pill appears.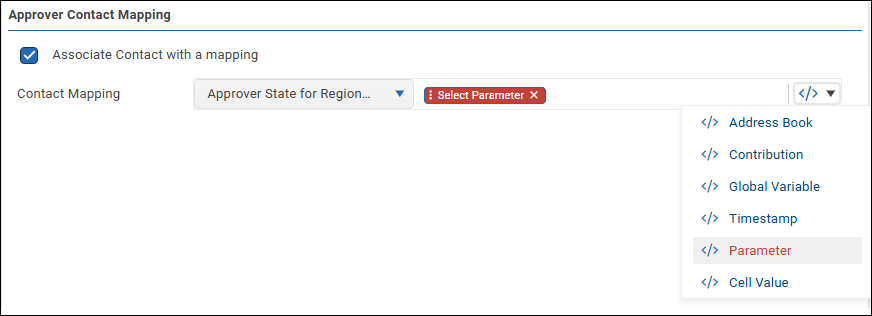
- Select the pill, select the burst parameter, and then select Save & Close.

- When you are finished configuring contact mappings, select Save Changes.
- In the appropriate area (Contributor Contact Mapping or Approver Contact Mapping), select Associate Contact with a mapping.
- In the Address Book, assign values to the mapped custom field(s) for each Campaign participant.
Tip: Entering custom field data in a spreadsheet may be more efficient than entering it for each contact individually. You can export Address Book data as an .xlsx file, edit it, and then import it.
Importing and Exporting Address Book Data #
Reportworq has a feature for importing and exporting the Address Book list of contacts. Import and Export are visible at the top of the Address Book screen. Contacts can be added or edited in bulk by exporting and importing via Excel files.
Contacts will only be modified or created during the import; they will never be deleted. To create a template file, make sure you have at least one contact and export to Excel. Columns can be deleted and moved in the template file; however the Id and Name columns are required. If the Id column is blank or fails to match an existing contact then a new contact will be created. Column headings that begin with the prefix D_ are built in distribution fields such as Email, Slack Channel and SharePoint Site. Column headings that begin with the prefix P_ are custom fields. It is permitted to create a new custom field in the import file by adding a column with this format.