
Overview #
Reportworq Workspaces enable organizations to provide separate working environments to each team, role, or department as required. Each Reportworq user can access resources for their Workspace(s) only. Each Reportworq user account can be assigned to one or more Workspaces.
The following features and services are shared across all Workspaces: Authentication, Web server, Microsoft 365, Cloud API, and Distributor configuration.
The following features are unique to each Workspace: Jobs, Contacts, Global Variables, Schedules, and configurations for Datasources and Report Providers.
This article describes how to create, manage, and work with Workspaces. It contains the following topics:
- Creating and Managing Workspaces
- Switching Between Workspaces
- Running Jobs
- Workspace Migration
- Additional Notes
Creating and Managing Workspaces #
Workspaces are created and managed in the Authentication interface (Administration > Authentication).
To create, rename, or delete a workspace:
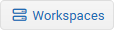
- In the Authentication interface, select the Workspaces button.
The Advanced Options pane appears, showing a list of Workspaces.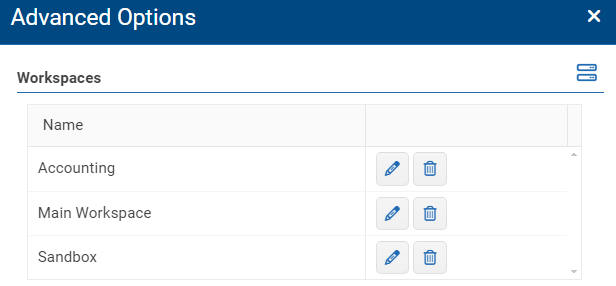
- If you want to create a new Workspace, select the Workplace selector icon
 , provide a name for the Workspace, and then select OK.
The new Workspace appears on the list. - If you want to rename a Workspace, select the rename icon
 beside the Workspace name, provide a new name for the Workspace, and then select OK. The Workspace is renamed.
 - If you want to delete a Workspace, select the delete icon
 button beside the Workspace name, and then select OK to confirm.
The Workspace is deleted.
To manage Workspace membership for a user account:
- In the Authentication interface, select the desired user account from the list.
Tip: The Search box and/or filter tool at the top of the list may help you find the user account more quickly.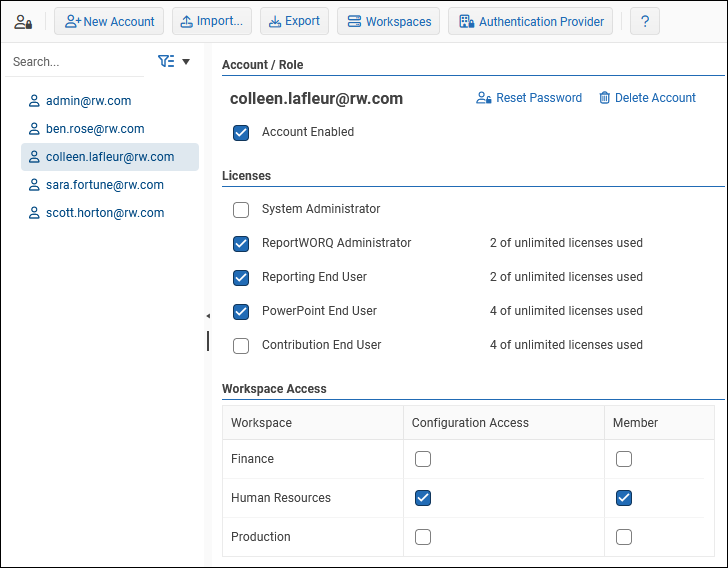
- In the Workspace Access area, select and/or clear checkboxes as required:
- Member — The user can access the Workspace.
- Configuration Access — The user can access the Workspace. They can also add, delete, and configure Datasources for that Workspace.
Note: Regardless of any Workspace Access permissions, System Administrators have full access to all Workspaces.
Switching Between Workspaces #
Switching between Workspaces is performed by selecting the Workspace selector icon  in the top navigation bar, in the main Reportworq view. If the user has access to multiple Workspaces, then this button will appear and the current Workspace will be displayed in the Reportworq footer. If the user only has access to a single Workspace then this button will not appear. If the user is a System Administrator or Reportworq Administrator, the Administration button will also appear beside the Workspace Selector. The user can only work in a single Workspace within a single browser tab at a time, so be sure that all work is saved before switching Workspaces. When the user logs into Reportworq, the last accessed Workspace is displayed by default. The user can work in multiple Workspaces simultaneously by using several browser tabs or windows.

Running Jobs #
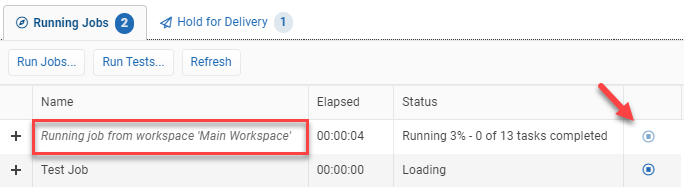
Reportworq Jobs from all Workspaces run in the same execution queue. Depending on the system configuration, a job may have to join a queue if no slots are available for execution. Therefore the Running Jobs screen will display jobs from all workspaces, which will help inform the user if their job is waiting in a Pending state. A user is not able to expand, cancel, or view the name of a job running from another Workspace. However, the Workspace will be identified so that it is known which team(s) is/are responsible for the jobs that are currently executing. To view or cancel a running job a valid Workspace Administrator must first switch to the Workspace from where the job originated.
Workspace Migration #
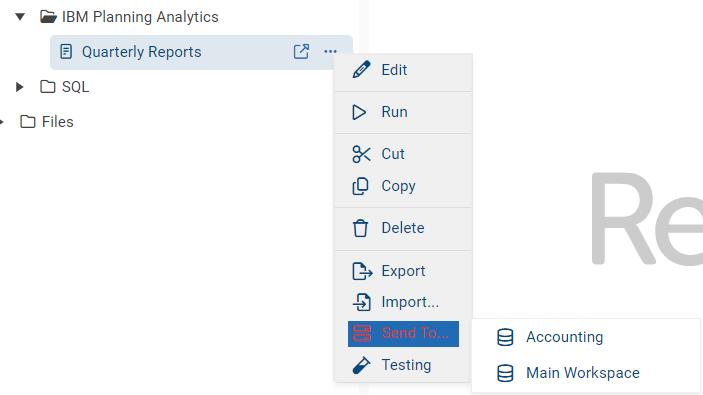
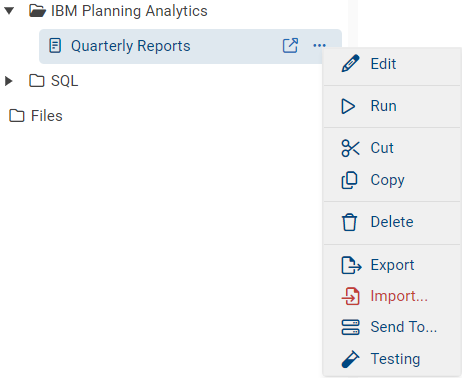
Jobs can now be migrated between workspaces as well as exported and imported between Reportworq installations. To move a job between workspaces, select the more options menu or right-click on the desired Job folder or multiple jobs by shift-clicking, select “Send to”, and then select the target workspace.
To export Jobs or folders select More options or right-click on the Job and then select Export. A zipped file will then be automatically downloaded through the browser. To Import, right-click inside the Jobs window and select Import. Then select the desired file in its folder location and the Jobs will be imported into the target workspace or alternate Reportworq workspace.
Additional Notes #
- The Reportworq Local API has a separate API Key configured for each Workspace. When using this API the Workspace will be determined based on a valid API Key. There is no need to provide Workspace information when using the Local API.
- The Reportworq Cloud API is configured at a global level and contains only a single API Key. Therefore, if multiple Workspaces are configured then a Workspace name must be provided in a “workspace={value}” query string.