Overview
This quick start guide will provide a high-level overview of the ReportWORQ User Interface and several common use cases. Before starting this guide be sure to complete the Installation & Configuration Guide which includes configuring Source Report Providers, Datasources and Distribution Providers as needed.
Product Overview
The ReportWORQ sidebar provides access to product functionality.
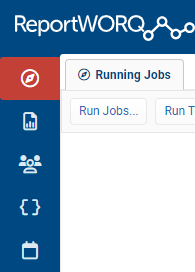
Activity - The activity section allows the user to run jobs, monitor running jobs, review and release jobs that have been held for delivery, review job history, and process Data Collection input forms.
Edit Jobs - This section provides a navigation tree and tabbed editor for organizing, creating, editing, and testing jobs.
Address Book - The address book provides a mechanism for creating contacts with personalized distribution details and custom properties. Bursted Jobs may use this information as part of the personalized distribution process.
Global Variables - Manage variables with a global scope for use in report distribution here.
Scheduling - The scheduler allows jobs to be scheduled and run at specific intervals.
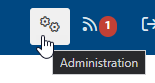
Administrative tasks and configuration can be accessed by any user with administrative rights by clicking the 'Administration' button at the top right of the screen.
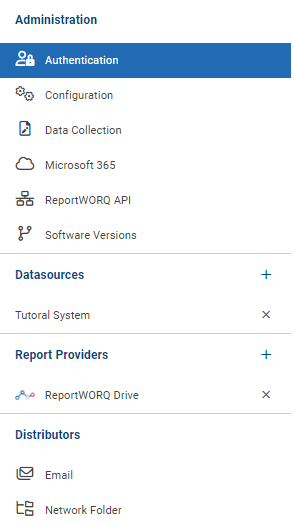
Authentication - Configure Native and Azure Active Directory Authentication.
Configuration - ReportWORQ web server settings.
Data Collection - This section is where the user can configure user data input settings.
Microsoft 365 - Leverage SharePoint, Teams, Email, and Authentication. ReportWORQ provides a single place to manage this configuration.
ReportWORQ API - This section provides a space to configure ReportWORQ automation for local and cloud environments.
Software Versions - The software versions page is used to download and upgrade the ReportWORQ software.
Datasources - This section is where the user can configure datasource connections that ReportWORQ will use to refresh reporting data.
Report Providers - This section is where the user can configure one or multiple sources for report templates.
Distributors - This section is where the user can configure distribution targets such as Email, SharePoint, and Google Drive.
Quick Start Tutorial
This guide will cover certain use cases using the tutorial files below. The Tutorial P&L.xlsx file in the tutorial includes a formatted P&L report which will be used for distribution and a Data worksheet which will serve as the demonstration database for refreshing data in this report. The data in the report is based on a filter that is located in cell D2 and known by the named range RNGLOCATION. Upon changing the value in this cell to another valid location, the data throughout the report will load for that specific location. In production scenarios, this data would have been loaded from a supported enterprise planning system such as IBM Planning Analytics or Workday Adaptive Planning. For this example, the report is simply using VLOOKUP formulas to load the correct data for that location. Inspect the data cells in the report to see these formulas. There are several other key pieces of information outside of the print range in addition to the filter cell. For example, the email address for the person who owns this location is located in RNGEMAIL, and commentary about the data in the report is located in ranges RNGREVENUE, RNGINCREASE & RNGDECREASE. These named ranges will be useful when it's time to distribute the report.
Tutorial Files
To use these tutorial files first download the zip file above and extract the folder either on the server or a network location that is accessible by ReportWORQ. The folder containing these files will need to be configured as a Source Report Provider in the integrations screen. If a source report provider already exists then simply extract these files into the existing configured location.
Tutorial Data source
This article will cover how ReportWORQ parameters can be driven dynamically using metadata and queries against configured datasource providers. To demonstrate this functionality the P&L Report file will need to be configured as an OleDB datasource.
Perform the following steps to create this datasource:
Navigate to the Integrations page and choose New Integration > OleDB Provider
Set the name to TutorialSystem
Set the connection string (update the path below):
Provider=Microsoft.ACE.OLEDB.12.0;Data Source=path_to_tutorial_files\Tutorial P&L.xlsx;Extended Properties="Excel 12.0;HDR=YES;"Set the Test Query:
SELECT * FROM [Regions$]Test and Save the datasource.
The 'Microsoft.ACE.OLEDB.12.0' provider is not registered on the local machine.
If the Microsoft.ACE.OLEDB.12 provider is not registered then download and install the Microsoft Access Database Engine 2010 Redistributable from the Microsoft web site.