
Connect CData sources#
Several connectors reach their source through a CData driver. CData drivers wrap an API or SaaS system and present it to Reportworq as a relational, tabular source, so you query it with the same table or SQL modes as any database. Reportworq uses CData so that systems with no native SQL interface, such as Salesforce or Jira, can still feed a data model and be refreshed on every job run.
Supported CData connectors#
Reportworq ships CData drivers for the sources below. Each name links to CData's own ADO.NET documentation for that driver, which is the authoritative reference for its connection properties, the tables it exposes, and the authentication options it supports. Go there whenever you need a property that is not on the Reportworq form.
| Source | Driver documentation |
|---|---|
| Azure Analysis Services | ADO.NET provider docs |
| Databricks | ADO.NET provider docs |
| Dynamics 365 | ADO.NET provider docs |
| Excel (a workbook exposed as a tabular source) | See Connect Excel, or the ADO.NET provider docs |
| HubSpot | ADO.NET provider docs |
| Jira | ADO.NET provider docs |
| NetSuite (can also import a saved-search schema) | ADO.NET provider docs |
| Power BI XMLA (the tile PowerBI XMLA - SQL, distinct from the native Power BI / SSAS ADOMD connector) | ADO.NET provider docs |
| QuickBooks Online | See Connect QuickBooks Online |
| SAP HANA | ADO.NET provider docs |
| Salesforce | ADO.NET provider docs |
| Smartsheet | ADO.NET provider docs |
| Workday (Financial Management and HCM, not Workday Adaptive Planning) | See Connect Workday, or the ADO.NET provider docs |
Snowflake is supported two ways: through the shipped CData SnowFlake driver and its guided field editor (the preferred method), or through a native ODBC connection using the generic ODBC Provider tile. Both are valid connection methods. See the dedicated Connect Snowflake page for the guided CData setup, and Connect Snowflake via ODBC for the ODBC alternative.
Configure a CData connection#
- Add the CData connector you need and open its editor.
- Provide the connection details. Most drivers accept a standard connection string of CData connection properties, and most also support OAuth for authentication. For an OAuth driver, complete the interactive Authenticate step, or supply the service-principal or client credentials the driver requires, so Reportworq can obtain and refresh a token.
- Where the driver exposes separate credential fields, enter secrets there rather than in the visible connection string.
- Save and select Test connection.
- Query the source in a data model through table or SQL mode, exactly as for the SQL connectors; see Query the source in a data model.
For per-connector traps, such as the Salesforce security token or the Power BI XMLA workspace and Azure app registration, see the Connector catalog. For QuickBooks Online, which signs in with OAuth, see Connect QuickBooks Online, including how to complete the sign-in on a headless or server install where there is no browser on the server. For Workday, see Connect Workday, including the Reports mode catalog-report setup.
Bring reports and saved searches in as tables#
Some of the most useful things in a finance system are not plain tables: a QuickBooks Profit and Loss report, a NetSuite saved search, a Workday WQL query. For these, the CData driver can generate a real table for that specific report or search, which then behaves like any other table on the connection: you can browse it, query it in table or SQL mode, use it in any data model, and it refreshes from the source on every job run. Reportworq calls this an Import. Several drivers also offer read-only Tools, diagnostic calls such as checking Salesforce API limits (see Tools).
Only a system administrator can run an Import or a Tool; this is the same right that governs adding and editing datasource connections. Other users see the buttons disabled, with the message "Only a system administrator can import objects into a datasource or run its tools."
The following table shows what each driver offers.
| Connector | Import actions | Tools |
|---|---|---|
| QuickBooks Online | Import report (25 standard reports); see Connect QuickBooks Online | Refresh driver metadata |
| NetSuite | Import saved search and Import RESTlet search, on a SuiteTalk connection | List my roles, Refresh driver metadata |
| Workday | Import WQL report, on a WQL connection; see Connect Workday | Refresh driver metadata |
| Salesforce | None | Check API limits, Record counts, Refresh driver metadata |
| HubSpot | None | Account details, Refresh driver metadata |
| Dynamics 365 | None | Table relationships, Refresh driver metadata |
| Every other CData connector | None | Refresh driver metadata |
You reach Import actions in two places:
- On a data model view's Design tab, in the toolbar above the canvas. The button is named for the action, for example Import report, and appears only when the model's datasource offers an Import. This is the quickest path when you want the imported table in the model you are building: after a successful import, the new table becomes the view's starting table on the canvas.
- On the datasource's own settings page (Settings > Integrations > the connection), in the Imported objects section below the connection's own settings. This is where you manage every table you have imported on the connection, regardless of which model first created it.
Where a driver offers more than one kind of Import, the button becomes a split button: selecting it runs the first Import, and the arrow opens the rest.
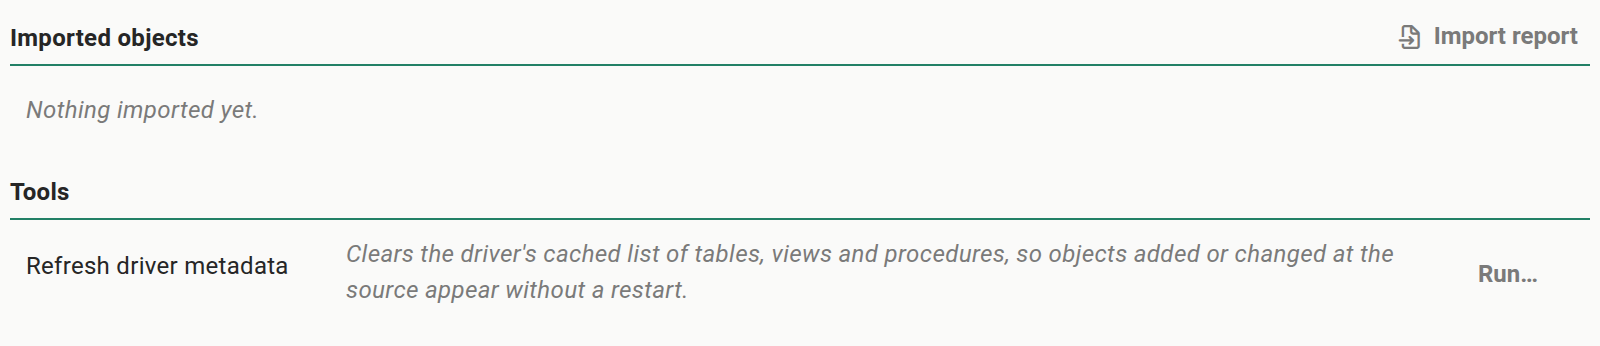
Run an Import#
Every Import opens the same kind of dialog, titled with the action's name.
- Select the Import action, on the data model's Connection tab or in the connection's Imported objects section.
- Fill in the dialog. Every setting is in one list; a setting that is on or off is a checkbox. Where an action offers a choice of reports, choose it first from the list at the top; the rest of the dialog then shows the settings that choice takes.
- Enter or accept the Table name. If a table with that name is already imported, or a schema file for it already exists, the dialog asks whether to Replace it. A name that matches one of the driver's built-in tables cannot be replaced; choose another name.
- Select Import. On success the dialog reports the table name and how many columns it has.
- Select Close.
QuickBooks Online: Import report#
The Import report action turns one of QuickBooks Online's standard reports - Profit and Loss, Balance Sheet Detail, Trial Balance, A/R Aging Summary, Sales by Customer, and so on - into a table. Choose the report from the Report list, accept or change the table name it fills in, and select Import. 25 reports are offered this way; the full list, with the settings each one takes, is in Connect QuickBooks Online.
Balance Sheet Summary and Customer Balance Detail are already built in, as the BalanceSheetSummaryReport
and CustomerBalanceDetail tables, so they are not on the Import report list - query them directly. Tax
Summary is not offered as an Import.
Most reports take an Accounting method (cash or accrual), a Default period (for example This Fiscal Quarter), a Default start date and Default end date, and Columns by (how a summary report splits its amount columns). These apply only when a query does not itself supply a date range.
Queries return rows up to the day of import unless they supply a start date and end date. A saved query or view over an imported QuickBooks report table should state its own
StartDate/EndDate(or rely on the table's own default period) rather than assuming the table always covers a fixed window - otherwise the numbers quietly drift forward every time the job runs.
NetSuite: Import saved search / Import RESTlet search#
Both actions are offered only when the connection's Schema property is SuiteTalk (the default). They are not available on a SuiteQL connection.
- Import saved search brings in a saved search already defined in NetSuite. Choose the search's
Record type, then pick the Saved search itself from the list (it is looked up live from
NetSuite once a record type is chosen); the table name fills in from the search's own name, made safe
for a table name (spaces, slashes, and other punctuation become underscores - for example, a saved
search called "A/R - Open Invoices (Q3)" fills in as
A_R_-_Open_Invoices__Q3_), and you can change it. The table is created, and appears on the Imported objects grid, under that safe name. Its columns are sampled from the search's first results; Rows to sample for column types (default 50) sets how many. - Import RESTlet search reaches a saved search through a RESTlet deployed in your own NetSuite
account, for searches the SuiteTalk API cannot return directly. Before you can use it, in NetSuite:
enable SuiteScript (Setup > Company > Enable Features > SuiteCloud), upload the driver's
search_script.jsto the File Cabinet, create a RESTlet script record from it and deploy it, then read the script and deployment numbers off the deployment's URL. Enter the table name, the search's Search ID (as NetSuite shows it, for examplecustomsearch123), the Script ID, and the Deployment number. Two checkboxes, Use labels as column names and Flatten select values, are selected by default.
Workday: Import WQL report#
Import WQL report is offered only when the connection's Connection Type is WQL (the driver's default when the property is left empty). Give the table a name, then paste the WQL query itself; if the query takes parameters, list them in Parameters. The easiest way to get a starting query is Workday's own Convert Report to WQL task against the report you want, which produces WQL you can paste in directly and adjust. Step-by-step: Connect Workday.
Regenerate, Regenerate all, and Remove#
Each imported table on the Imported objects grid carries the actions it currently supports:
- Regenerate re-runs the same Import with the same arguments, replacing the table's schema. Use it after the source's shape changes (a report gains a column, a saved search's fields change) so the table matches it again. If a regenerate drops a column the table had before, Reportworq tells you which one - check any view or query that relied on it.
- Regenerate all regenerates every table on the connection that currently supports it, in one action.
- Remove deletes the table's schema file and its entry from Reportworq's records. The underlying data in the source system is never touched - this only removes Reportworq's local table.
An imported table can also show one of a few states instead of being simply active:
- Not available in the current mode - the table was imported while a connection property (for example NetSuite's Schema) was set differently than it is now, so the driver no longer reads it. It can only be removed.
- File missing - the table's schema file is gone from disk. It can be regenerated or removed.
- Found on disk, not managed by Reportworq - a schema file that exists in the connection's folder but was not created through an Import. It can only be removed.
Tools#
Several CData drivers also offer read-only Tools - diagnostic calls to the source that return a small result rather than creating a table. They answer questions such as "how much of our Salesforce API allowance is left?" or "which NetSuite roles can this connection use?" without leaving Reportworq. You reach them on the datasource's settings page, in a Tools section below the connection's own settings (and below Imported objects, where the driver has one). Like Import actions, running a Tool requires a system administrator.
To run a tool:
- Go to Settings > Integrations and open the CData connection.
- In the Tools section, find the tool and select Run. A tool that takes settings shows Run… instead, and opens a dialog for them first.
- In the dialog, set any settings the tool takes, and select Run.
- Read the result in the dialog. Select Run again to repeat it, or Close.
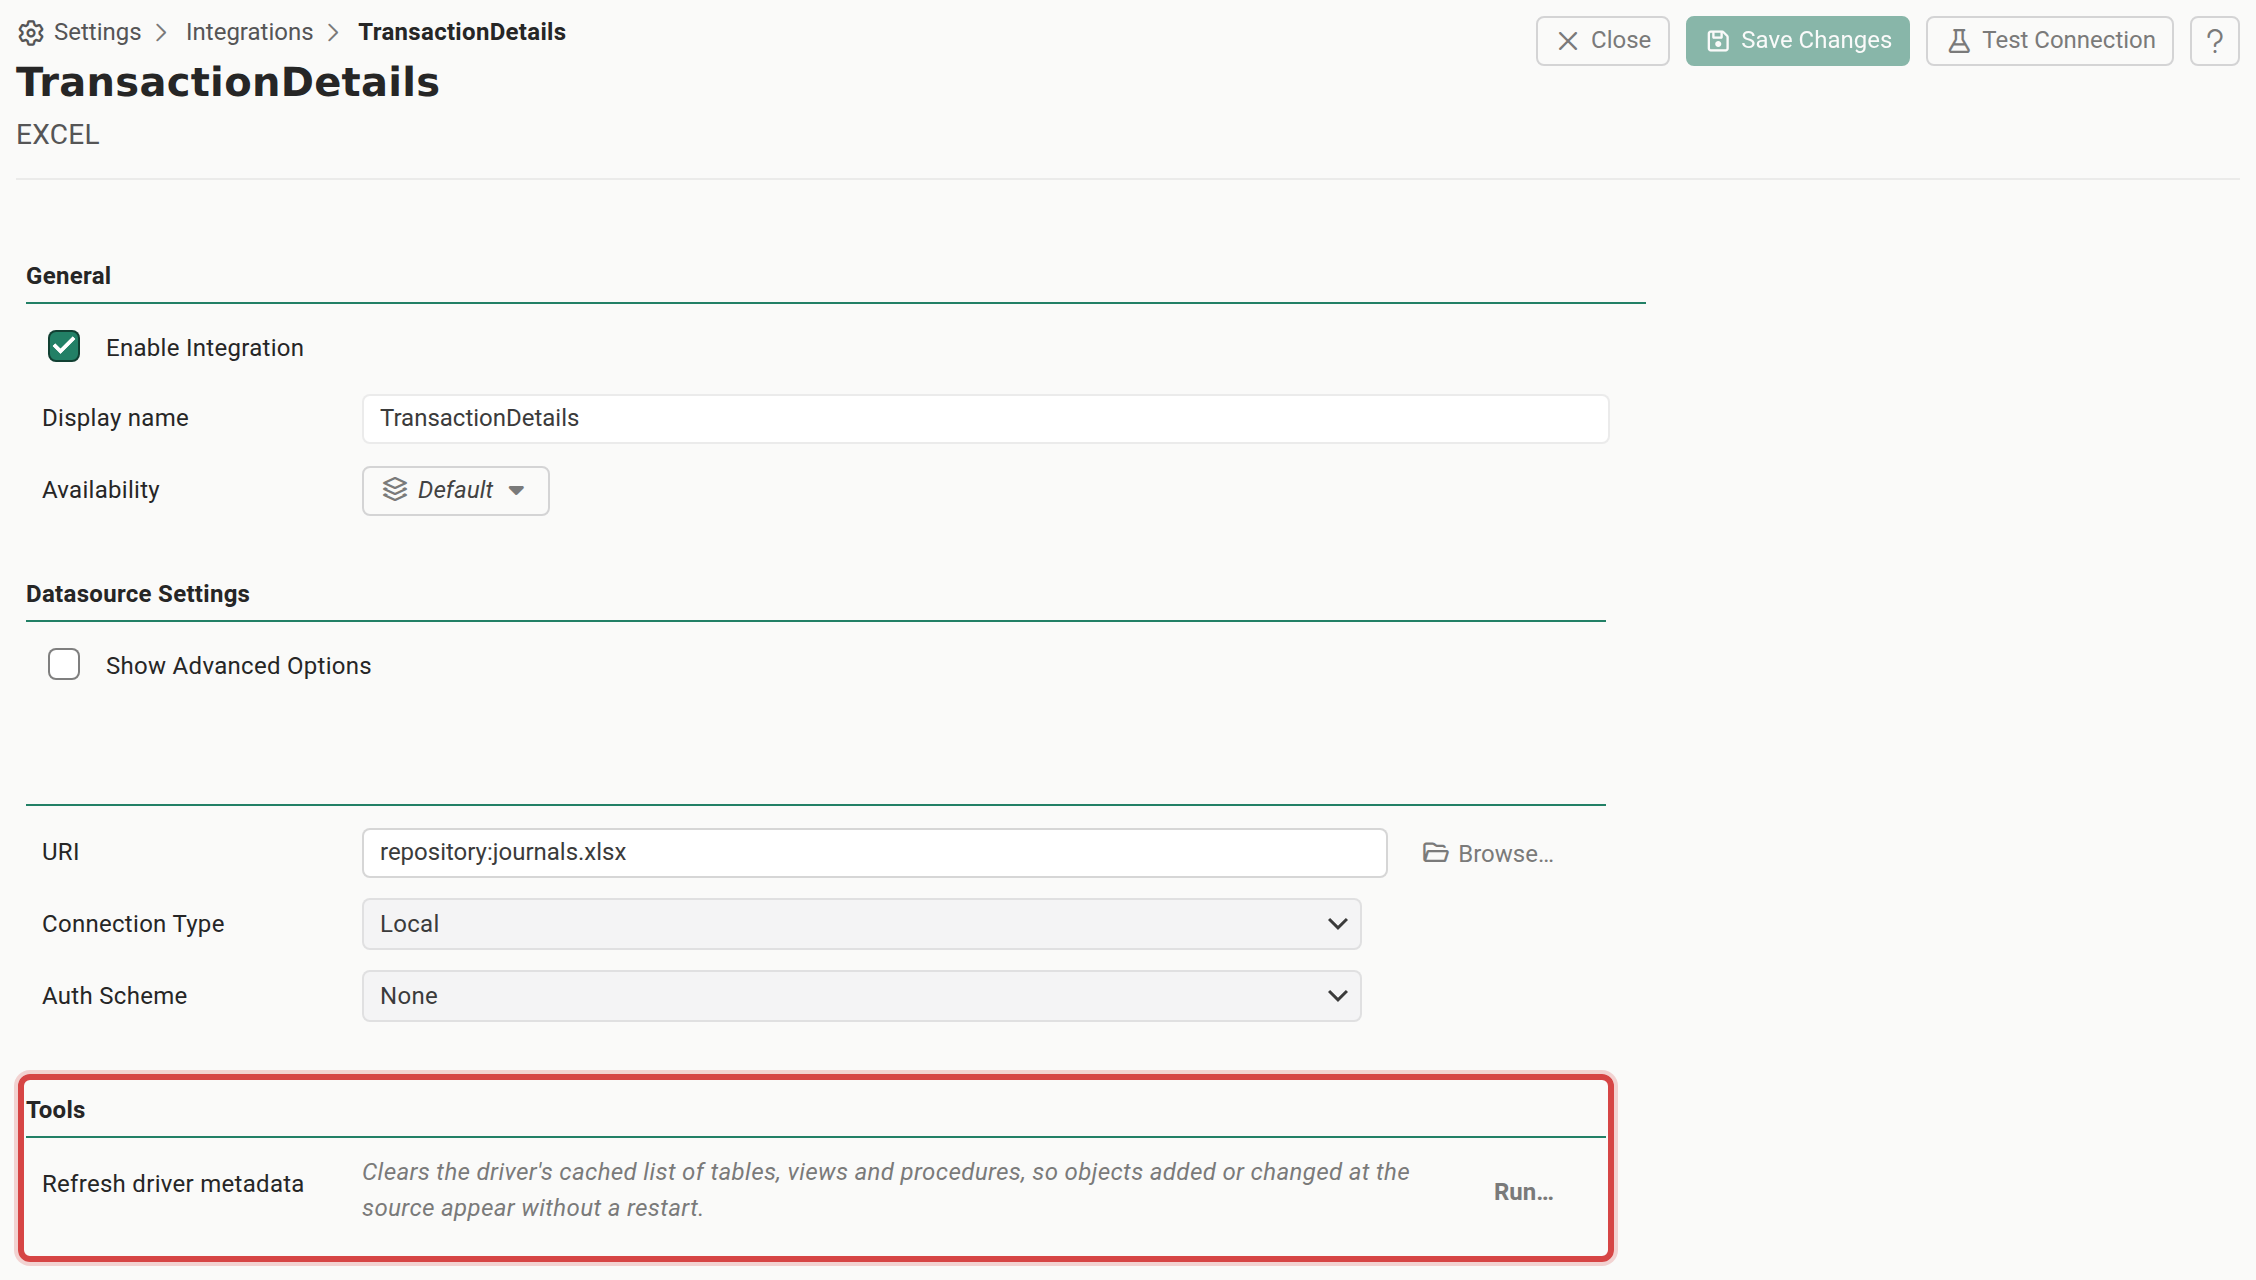
The tools each driver offers are:
- Refresh driver metadata - on every CData datasource. Clears the driver's cached list of tables, views, and procedures, so objects added or changed at the source appear without restarting Reportworq. What to refresh defaults to All, which is always safe; the other choices clear a narrower cache. Not every driver supports clearing its own cache (NetSuite is one that doesn't); when it doesn't, Reportworq still resets the connection pool - which is often enough on its own to pick up the change - and the tool tells you that's what happened, rather than reporting a failure.
- Check API limits and Record counts - Salesforce. Show the organization's API allowances and approximate per-object record counts (Salesforce caches these, so they can lag recent changes).
- List my roles - NetSuite. Lists the accounts and roles the connection's credentials can use, with their domains. Works only when the connection signs in with a user name and password.
- Account details - HubSpot. Shows the account's portal ID, currencies, time zone, and data-hosting location.
- Table relationships - Dynamics 365. Lists a chosen table's navigation properties: the related tables it links to.
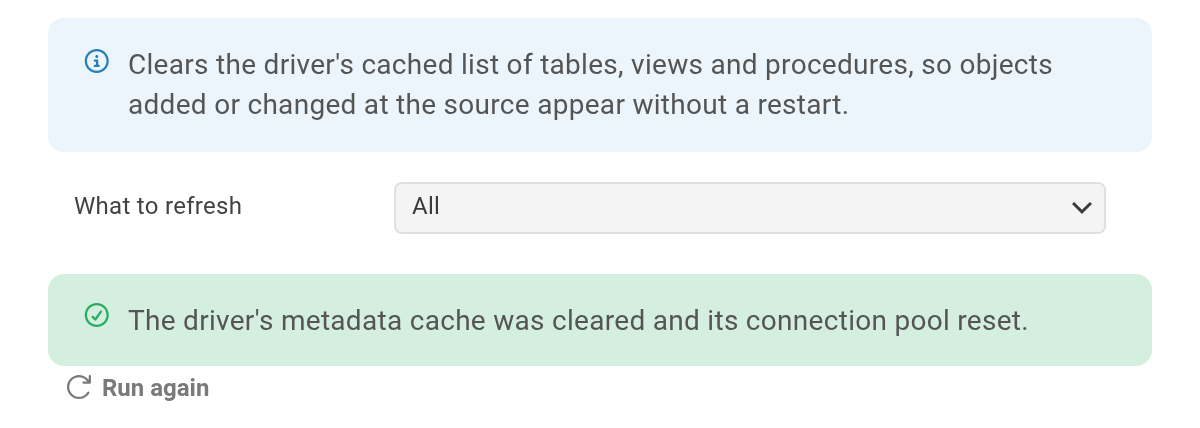
A Tool returns at most 5,000 rows. A Tool never returns a column that looks like a credential (a token, secret, password, or session ID) - if the source's response includes one, Reportworq withholds it and says so.
Find the connection properties for a driver#
Each CData driver has its own connection properties and authentication options. To find them, start from the CData drivers documentation, open the driver for your source, then open its ADO.NET online documentation, which lists the connection-string properties and the OAuth setup for that source.
Related pages#
- Connect SQL Server, OLE DB, and ODBC for the relational connectors the CData drivers are built on, including the shared query modes.
- Connect Snowflake and Connect Snowflake via ODBC.
- Connect QuickBooks Online.
- Connect Workday for Workday itself and the Reports mode catalog-report setup.
- Connect Excel for a workbook on the server or inside the repository.
- Connector catalog for every connector Reportworq ships and its per-connector traps.
Going deeper. To curate columns into governed business fields, set filters, and publish a view for report authors, see Data models.
Feedback on this page
Comments, questions, requests, or something missing or unclear? Email us - the page you are on is filled in for you.
Email feedback on this pageOr write to support@reportworq.com directly.