
Connect Snowflake#
Reportworq connects to a Snowflake cloud data warehouse in two supported ways:
- The guided CData SnowFlake tile (preferred). It ships with Reportworq and presents a field editor (Warehouse, URL, Auth Scheme, Database, Schema), so you fill in named fields rather than hand-building a connection string, and it supports key-pair authentication natively. This is the recommended path and the rest of this page walks through it.
- A native ODBC connection through the generic ODBC Provider tile, using a Snowflake ODBC driver and DSN. This is a valid alternative for environments that prefer or require a native ODBC/DSN setup. See Connect Snowflake via ODBC.
Both routes query Snowflake through table or SQL mode in a data model, exactly like any other datasource.
Configure a Snowflake connection#
The SnowFlake connector uses the shipped CData Snowflake driver and presents a guided field editor, so you fill in named fields rather than hand-building an OLE DB or ODBC connection string. Key-pair (private-key) authentication is supported natively, alongside password, single sign-on, and OAuth options.
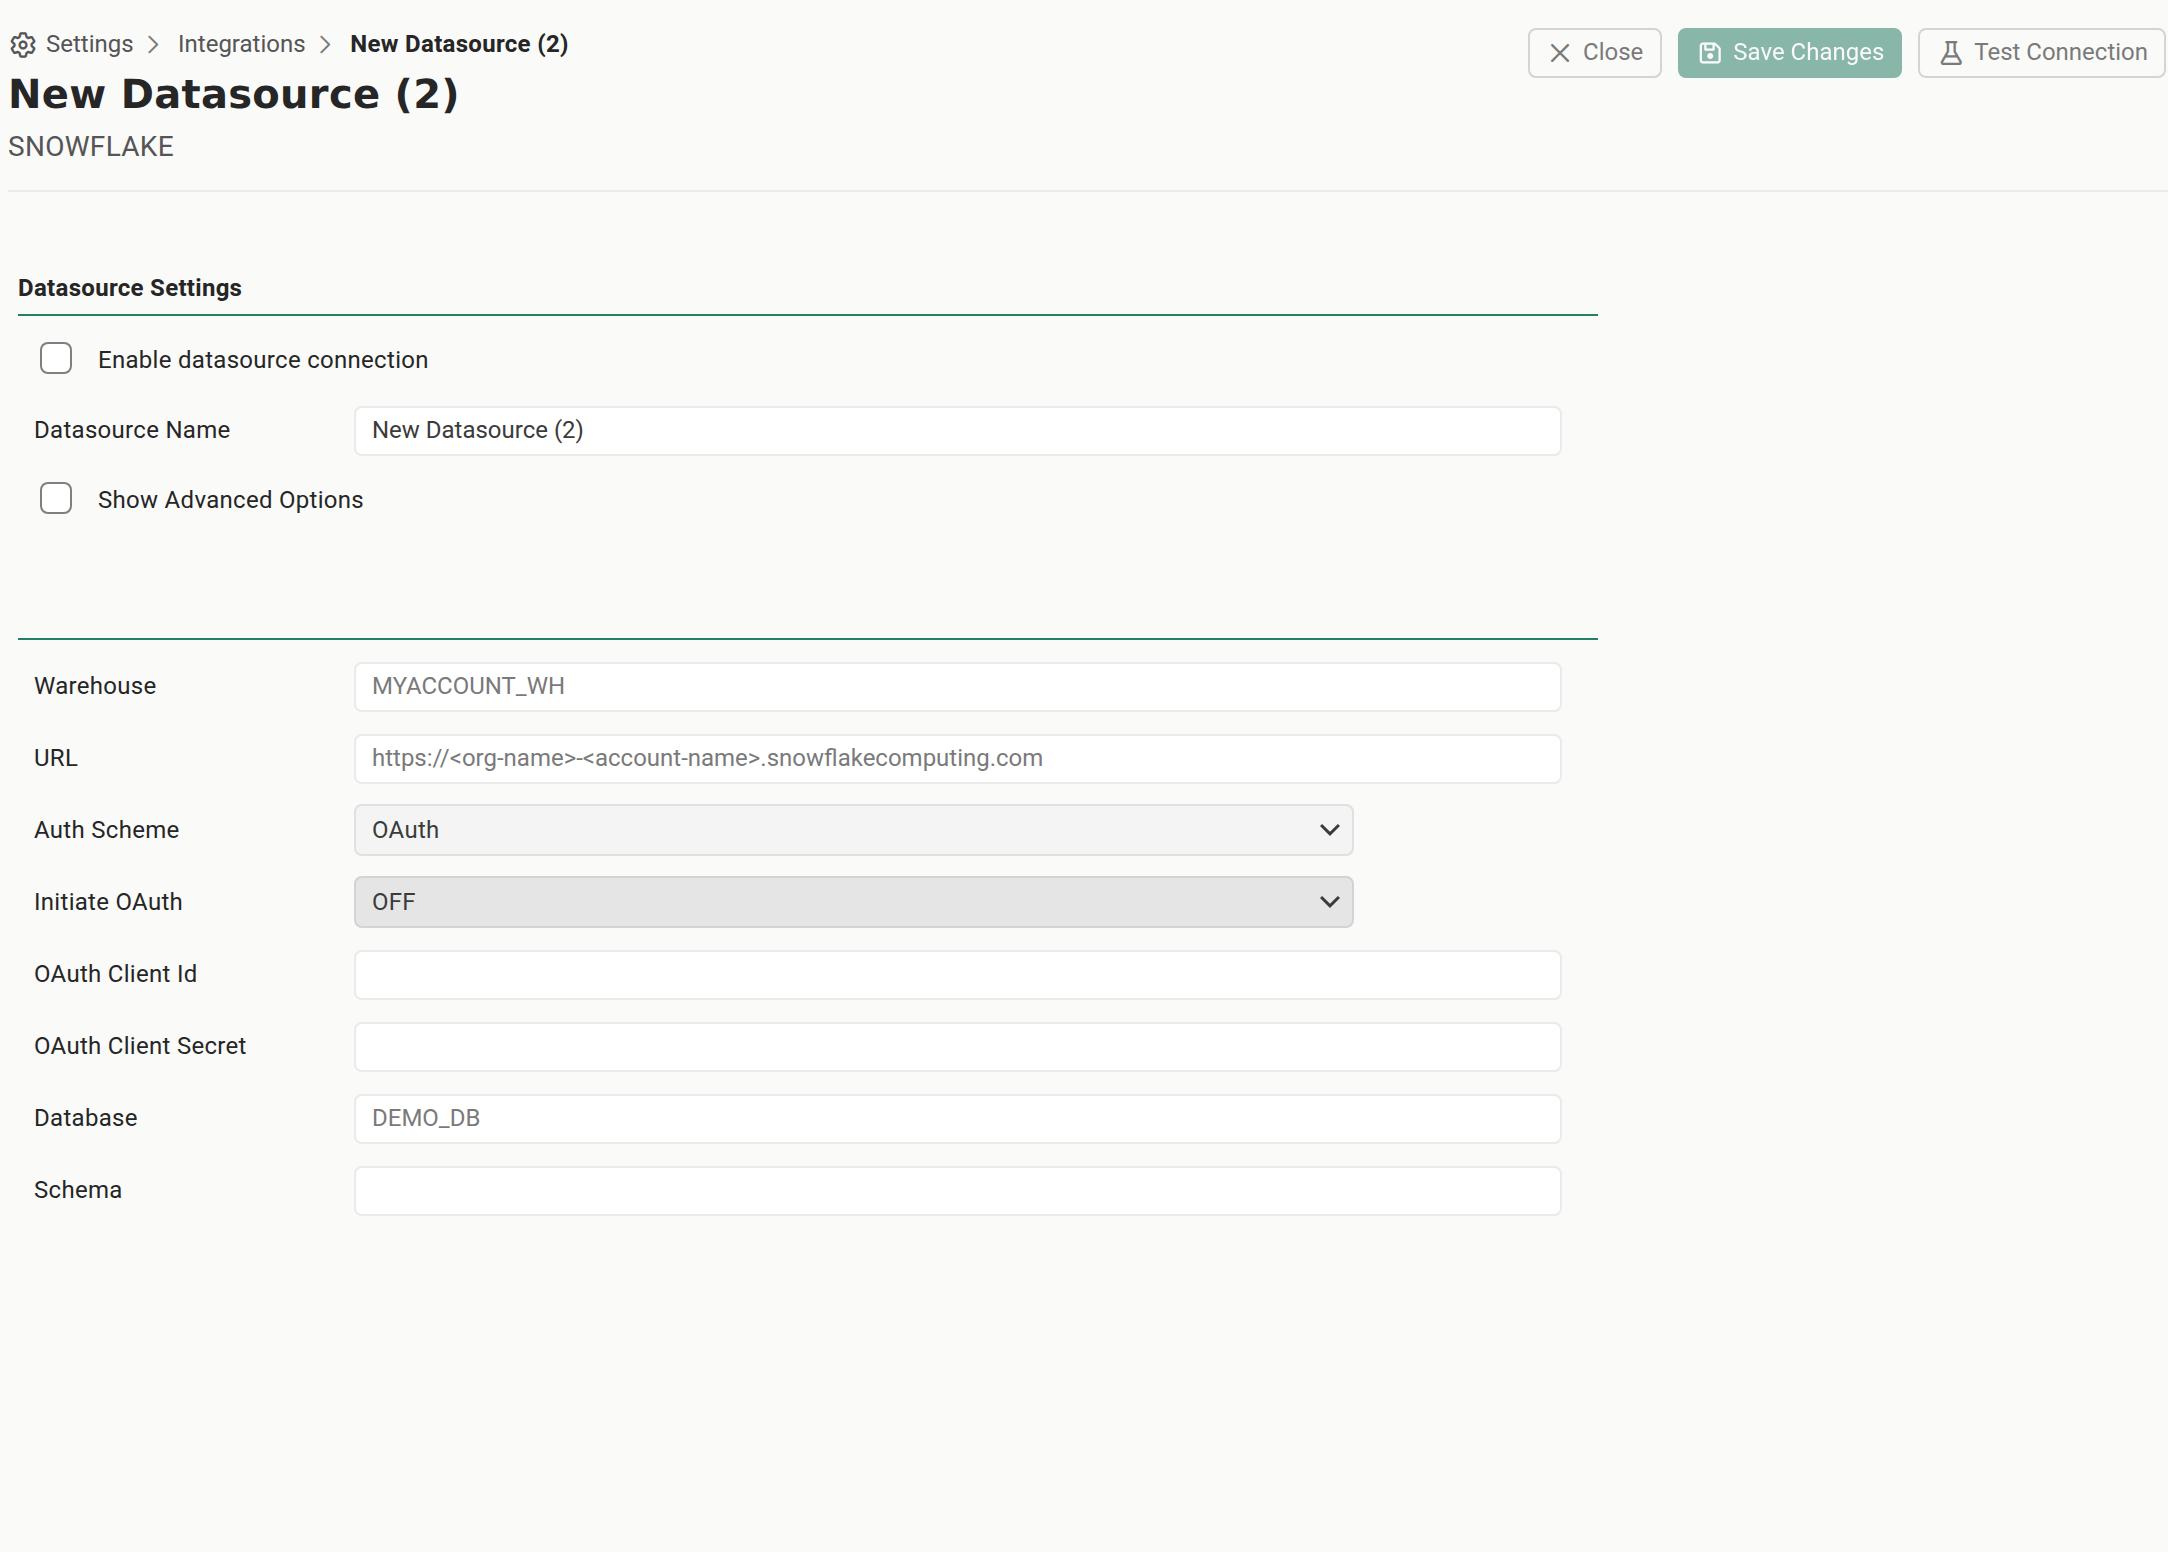
In Settings > Integrations > DATASOURCES, add the SnowFlake connector and open its editor.
Fill in the connection fields:
Field What to enter Datasource Name A unique display name for this connection. Warehouse The name of the Snowflake warehouse to run queries against. URL Your Snowflake account URL, in the form https://<org>-<account>.snowflakecomputing.com. (A legacy account URL looks likehttps://<account>.<region>.snowflakecomputing.com.) To find it, open your Snowflake UI, hover over your account, and copy the account URL. The account is normally derived from this URL automatically.Auth Scheme The authentication method (see the list below). Database The name of the Snowflake database. Schema The schema within that database. Select an Auth Scheme. The CData Snowflake driver accepts:
- Password - Snowflake username and password.
- OKTA - federated sign-in through Okta.
- PrivateKey - key-pair (private-key) authentication. See the callout below.
- AzureAD and AzureMSI - Microsoft Entra ID user sign-in, or an Azure managed identity.
- OAuth - OAuth 2.0, including the external-browser and identity-provider variants (ExternalBrowser, PingFederate).
The fields that appear below the Auth Scheme change to match the method you pick, for example a username and password for Password, or a key file and key password for PrivateKey.
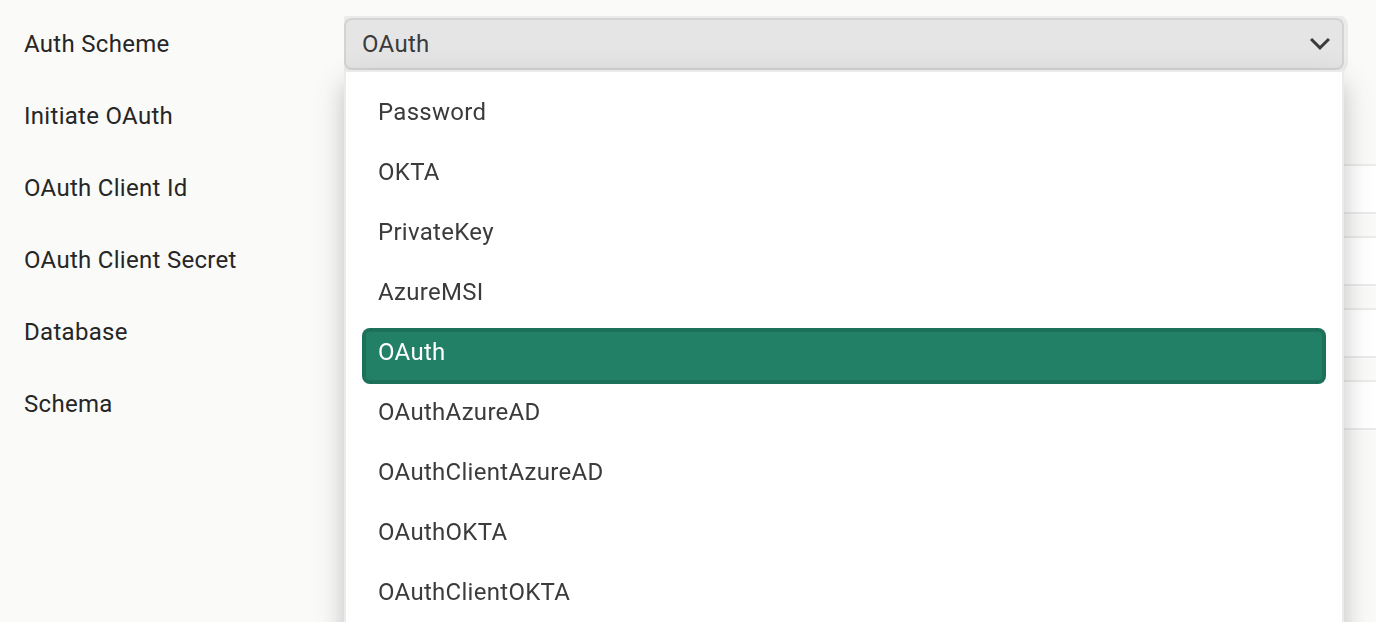
The Auth Scheme dropdown open on the SnowFlake field editor, listing the CData Snowflake driver's authentication methods, including Password, OKTA, PrivateKey, AzureMSI, and OAuth, with OAuth selected.Tap or click the image to view it full screen Turn on Show Advanced Options to reveal the driver's advanced connection properties (role, additional TLS and proxy settings, and the rest of the CData property set) when a connection needs one that is not on the basic form.
Save and select Test Connection. A valid, reachable account returns success.
Query the source in a data model through table or SQL mode, exactly as for the other CData and SQL connectors.
The fields on this editor come from the CData Snowflake driver itself, so the exact labels and the available Auth Scheme options follow the driver. For the full property reference, open the CData Snowflake driver and follow its ADO.NET online documentation.
Key-pair (PrivateKey) authentication#
Snowflake key-pair authentication is supported natively through the guided editor: set Auth Scheme to PrivateKey, enter the Snowflake User, and point the driver at the private-key file (for example a .p8 or .pem file readable by the Reportworq server) with its key password if the key is encrypted. This avoids storing a Snowflake password, and is the recommended method where your Snowflake account is configured for key-pair auth.
Existing OLE DB Snowflake connections#
Snowflake connections created before the CData SnowFlake tile shipped were saved as generic OLE DB connections. Those existing datasources keep working and continue to open under the generic OleDB Provider editor with their saved connection string; they are not migrated automatically. Only newly created SnowFlake connections use the guided CData field editor described here. To move an older connection onto the CData driver, create a new SnowFlake datasource and repoint the data models that used the old one.
Connect through ODBC instead#
If you prefer a native ODBC/DSN setup, or an environment or driver requirement makes ODBC the better fit, you can connect Snowflake through the generic ODBC Provider tile instead. It is a supported alternative to the guided tile, not a temporary measure. See Connect Snowflake via ODBC for the driver prerequisites, the recommended System DSN approach, and the DSN-less connection strings for key-pair and username/password auth.
Notes and limits#
- Only administrators can add or configure datasource connectors.
- For the shared CData add-and-test flow and the connector catalog, see Connect CData sources and the Connector catalog.
- Once the connection tests, query Snowflake in a data model through table or SQL mode. See Data models.
Feedback on this page
Comments, questions, requests, or something missing or unclear? Email us - the page you are on is filled in for you.
Email feedback on this pageOr write to support@reportworq.com directly.