
Create an AI Profile for a report#
The AI Profile step of the Job Editor lets you attach a plain-language description and audience metadata to a report so that AI assistants, search, and recommendations know when the report should be referenced. It is metadata only: it changes how the report is discovered and surfaced, not how the report renders or what it outputs.
This is Reportworq's "AI done differently" idea. Most AI systems try to reverse-engineer a business from raw databases. Reportworq instead presents AI with reports your finance teams have already curated, and the AI Profile is where you enrich a report with the structured business context, purpose, audience, strengths, limitations, terminology, and caveats, that teaches AI how your business already communicates. The result is lower token usage, greater confidence, and answers based on the same information your teams already trust.
When to use it. Fill in an AI Profile once a report is functionally complete, especially in a large report library where people (and assistants) need help finding the right report. A well-described report is the one an assistant surfaces when someone asks a natural-language question.
Before you start#
- A report to describe. The AI Profile is the fifth Job Editor step, before Test.
- The value is realized wherever AI, search, and assistant surfaces are in use. See AI in Reportworq.
- Writing the profile by hand needs nothing else. To have AI draft it instead, an AI connection has to be configured for your instance and the report has to have generated a sample output. See Speed it up with AI prefill and templates.
Describe the report#
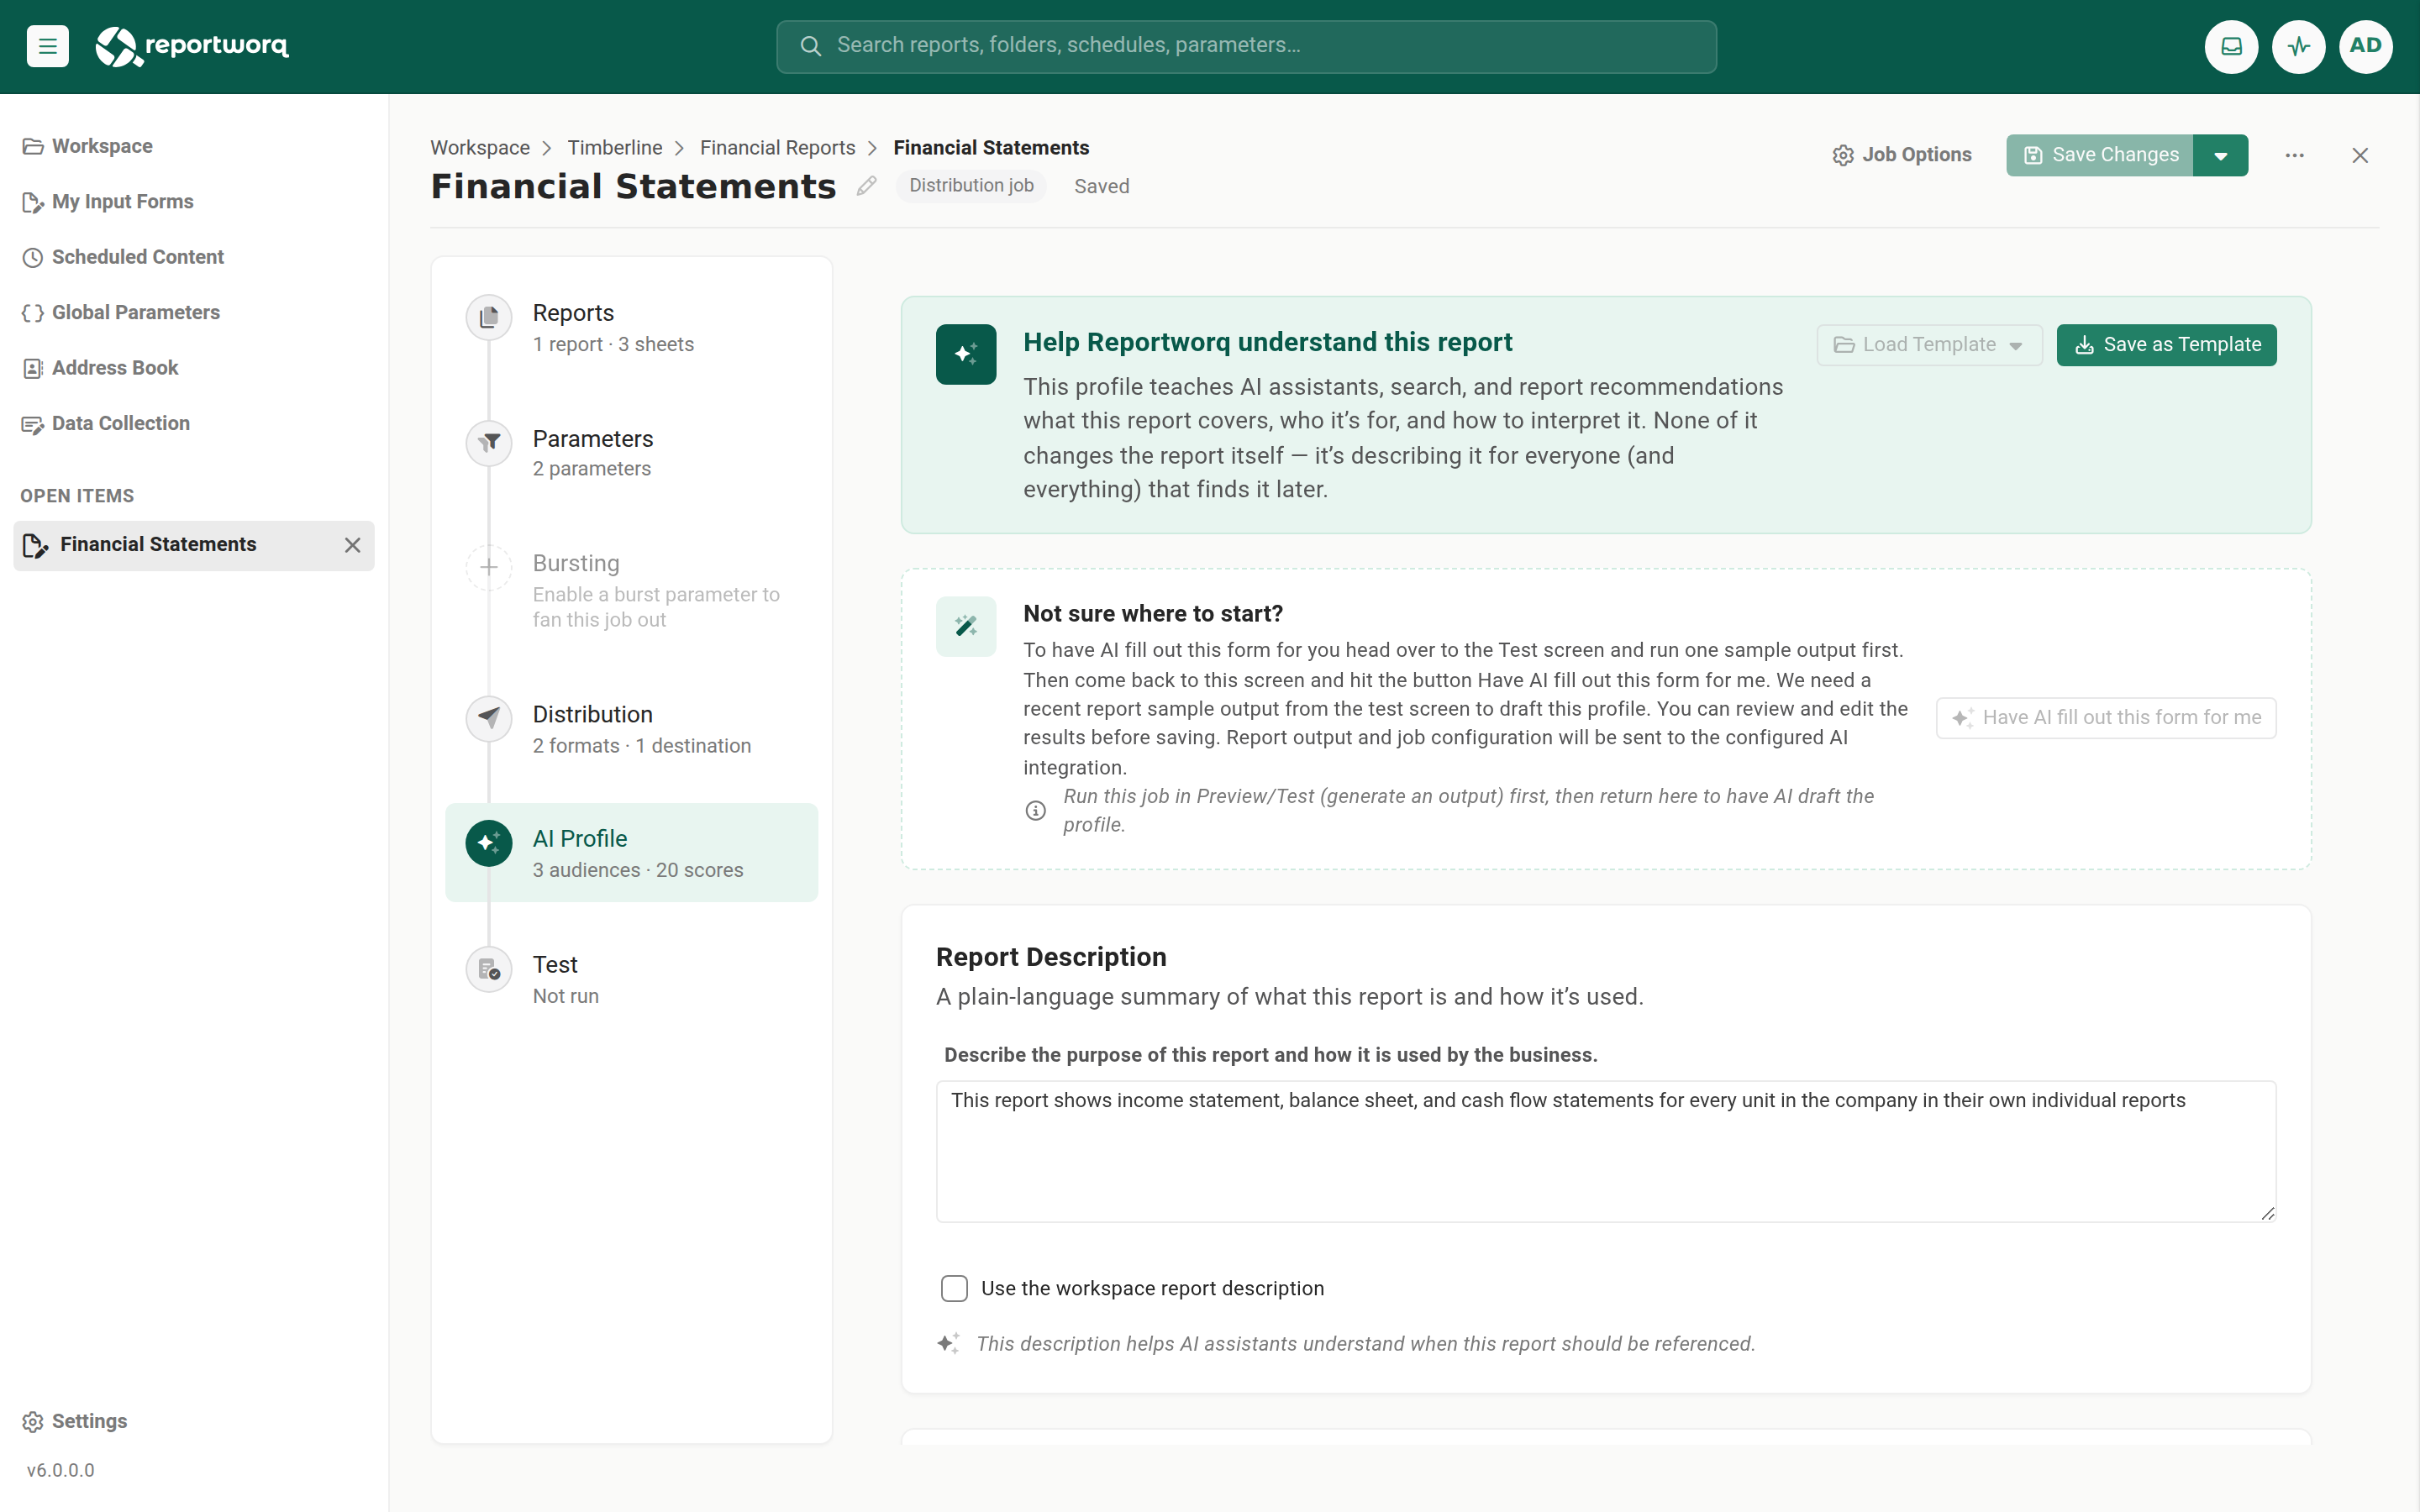
Open the report and go to the AI Profile step.
Write a Description of what the report contains, what questions it answers, and when it is relevant. Aim for the questions a reader would actually ask. Alternatively, turn on Use workspace description to inherit the workspace's description instead of writing a per-report one.
Where descriptions come from. Every workspace item, a report, a folder, a data model, or a campaign, carries its own free-text Description on its Properties panel, and that is what the workspace description above refers to. Descriptions are worth filling in for their own sake: they show in the item table and in search results. See Item properties.
Set the Audience and Data Type tags. Pick from the existing options or create new ones inline, so the lists grow with your library.
Set the Relevance scores: for each business-dimension category, drag the 0-10 slider to say how strongly this report relates to that dimension. You can edit the categories themselves with Edit Categories.
Save the job.
Speed it up with AI prefill and templates#
Reportworq can draft the whole profile for you. Two things have to be in place first, in this order, and neither is optional: an AI connection, then a sample output from the report itself.
Set up an AI connection#
AI prefill uses your organization's own AI provider, not a model built into the product, so nothing AI-assisted works until a connection exists. An administrator creates it in Settings ▸ Integrations, in the AI Connections group: select the provider tile (OpenAI, Azure OpenAI, Amazon Bedrock, or Reportworq Hosted AI, depending on what your instance offers), enter its credentials and model, and turn on Enable provider. Use Test connection in the editor before saving, so a wrong key, endpoint, or model surfaces there rather than as a failed draft later. See Connect an AI provider.
Until a connection exists, the AI prefill panel does not appear on the AI Profile step at all. If you cannot find the button, that is the reason, and it is an administrator's task rather than yours.
Generate a sample output#
AI drafts the profile from the report's actual content, not from its definition alone, so the report has to have run and produced an output for AI to read.
- Go to the Test step of the Job Editor.
- Select Generate Output and let the run finish successfully.
- Return to the AI Profile step.
Until that run has produced an output file, Have AI fill out this form for me stays disabled, with the note "Run this job in Preview/Test (generate an output) first, then return here to have AI draft the profile." Not every output format can be read for a sample. If the format is not supported, Reportworq asks you to generate an Excel output and try again.
Draft the profile#
- On the AI Profile step, select Have AI fill out this form for me.
- If the profile already holds values, confirm the prompt to replace them. AI prefill overwrites the fields it fills.
- Review every drafted field and correct anything wrong. The draft is a starting point, not an answer.
- Save the job. Nothing is saved automatically.
The report's output and its job configuration are sent to the configured AI connection to produce the draft. Treat that the way you treat any other data leaving your instance, and confirm the report's content is appropriate to send before using prefill on it.
Reuse a profile with templates#
Use Save as Template to keep a finished profile, and Load Template to apply it to a similar report. Templates need no AI connection. Load Template is unavailable until at least one template has been saved.
Notes and limits#
- The AI Profile is discovery metadata. It does not change the report's data, worksheets, parameters, or output.
- Audiences, data types, and scoring categories are author-chosen and extensible, not a fixed system list.
- The profile feeds AI-facing surfaces: the in-app assistant, AI and global search, recommendations, and Copilot or MCP access to reports.
- AI prefill needs both a configured AI connection and a successful Test-step output. It overwrites the fields it fills and never saves on your behalf, so review the draft and save the job yourself.
Going deeper. How governed AI works across Reportworq, which providers you can connect, and how assistants, Copilot, and MCP consume report context is covered in the AI & Integrations guide.
Feedback on this page
Comments, questions, requests, or something missing or unclear? Email us - the page you are on is filled in for you.
Email feedback on this pageOr write to support@reportworq.com directly.