
Distribution overview#
Authoring builds a report; distribution delivers it. The Distribution step of the Job Editor is where you decide three things: what output formats the report generates, how each file is named and organized, and which destinations receive it. It is the step that turns a refreshed Excel template into the personalized email, the archived PDF, or the Slack post your recipients actually see.
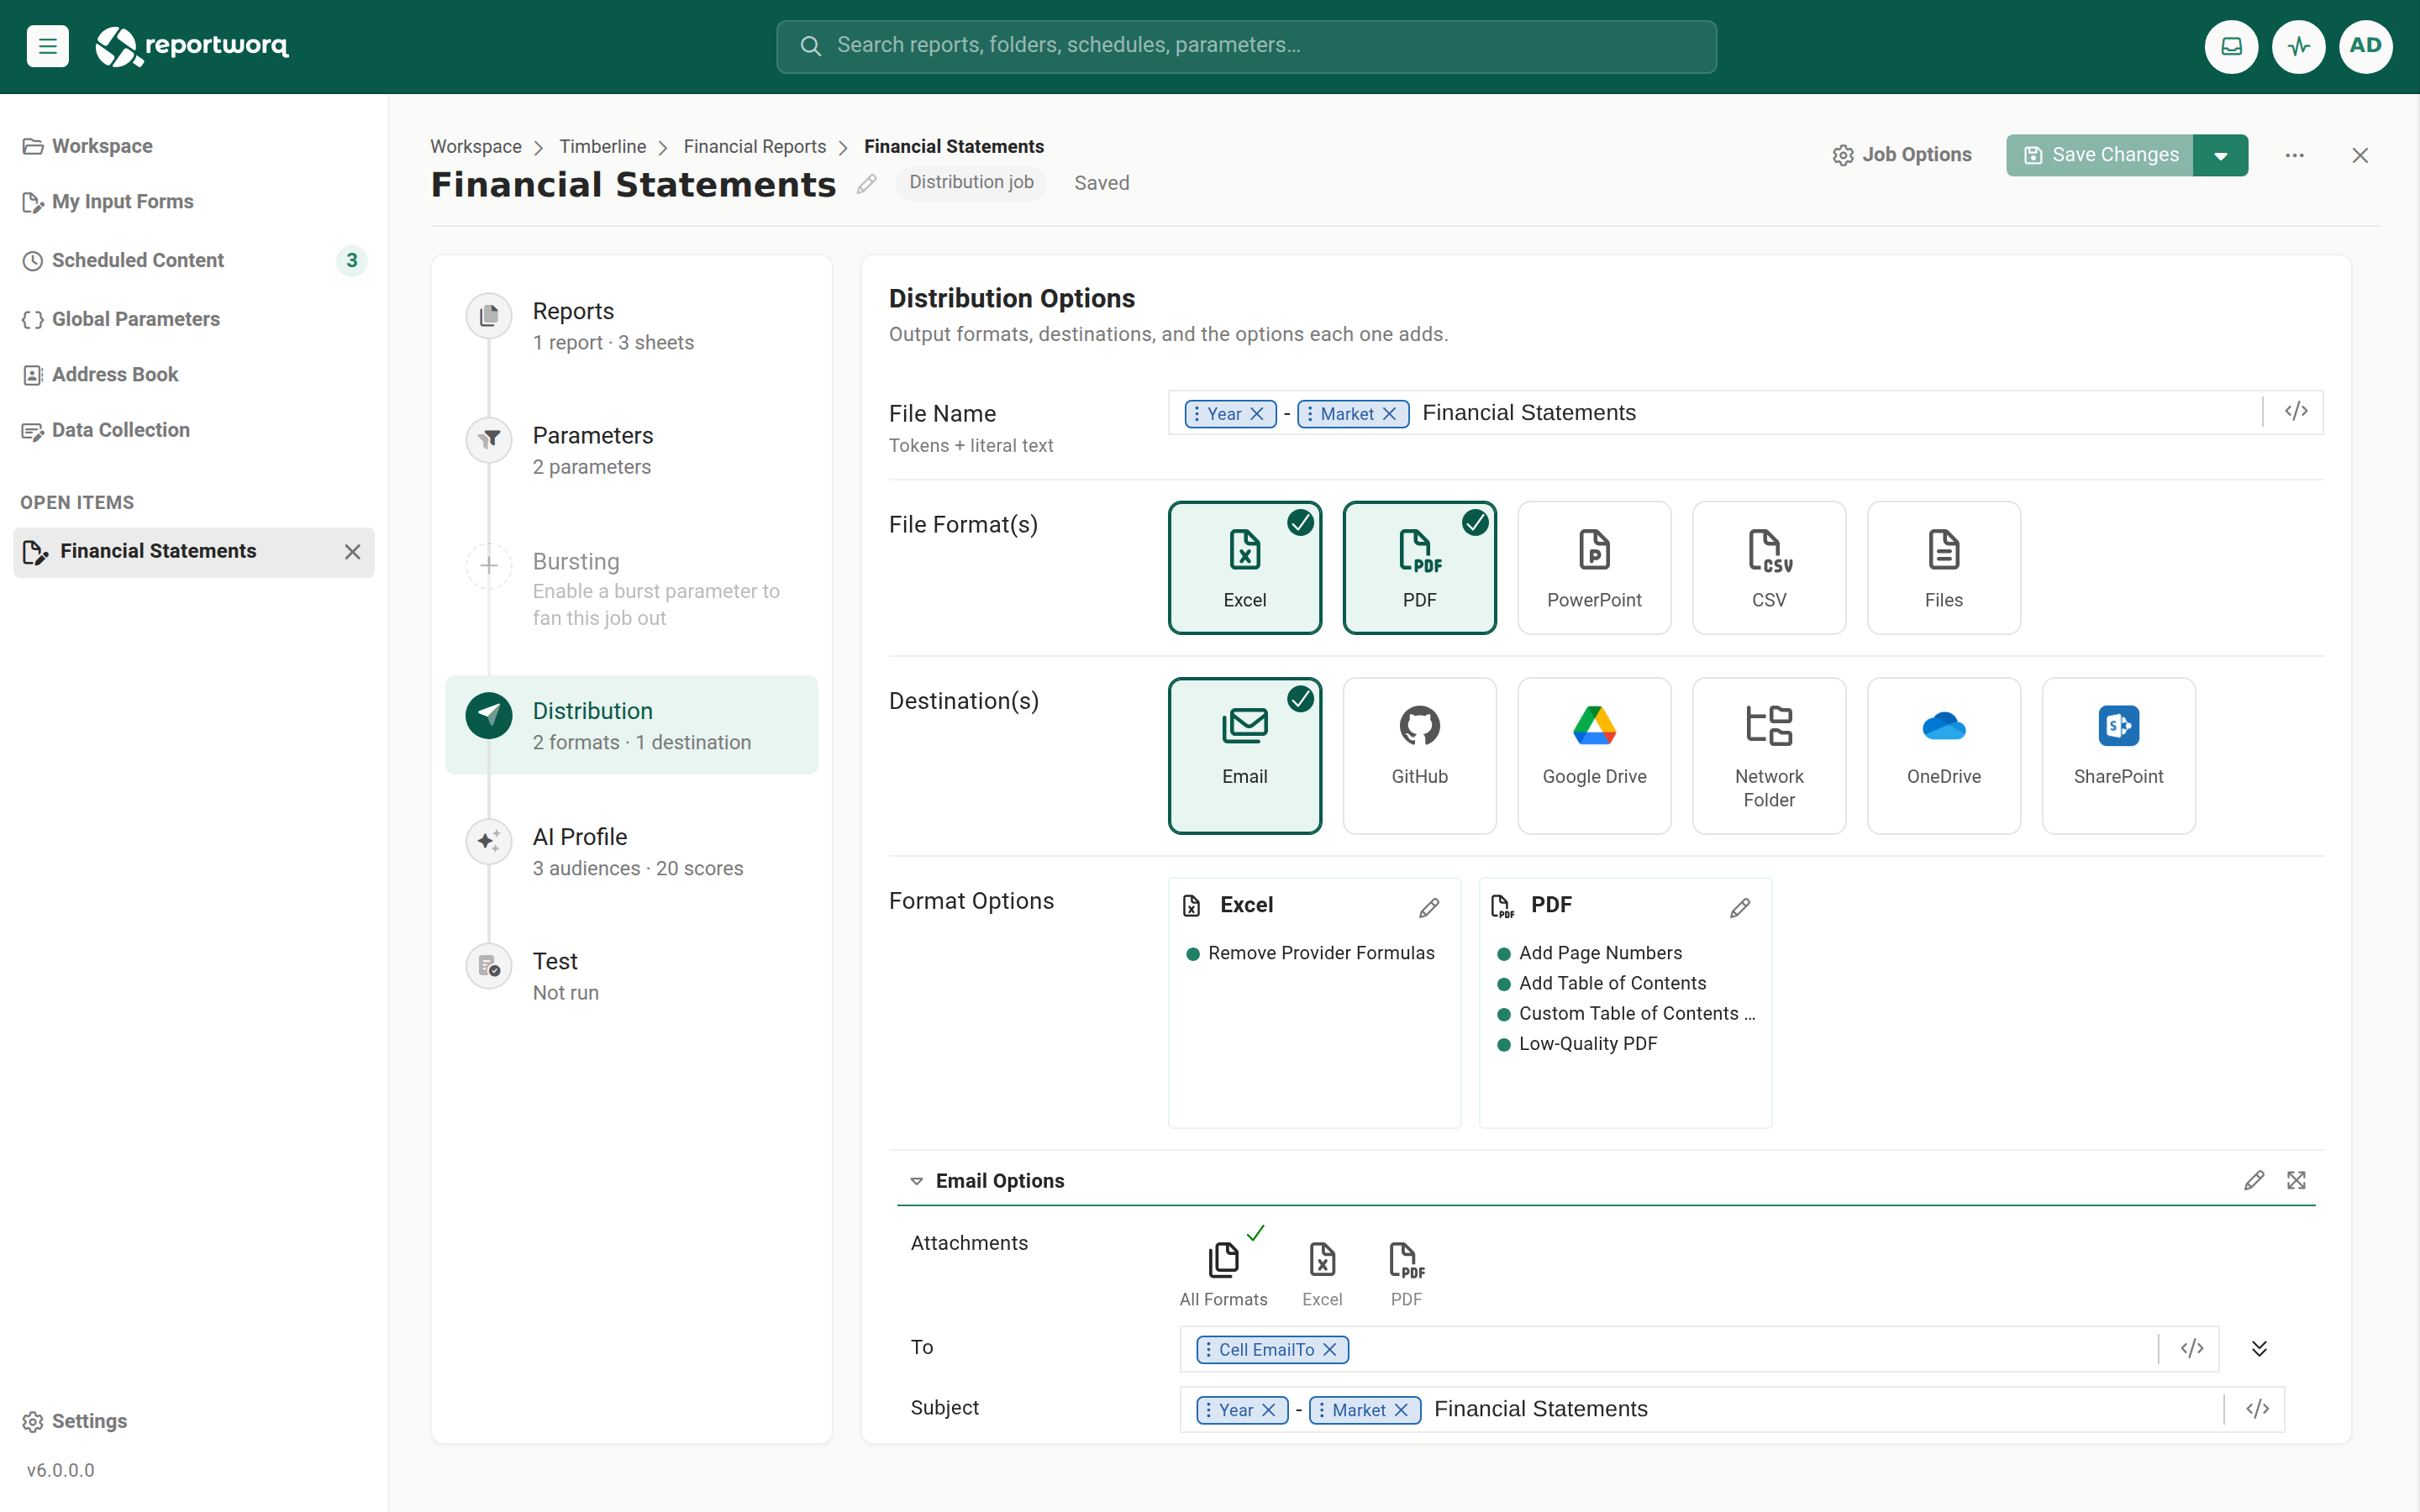
The mental model: formats times destinations#
A single job is not locked to one file type or one place. On the Distribution step you select output formats as a set of tiles, and destinations as a second set of tiles, and Reportworq produces the cross-product: every selected format is generated once, then each destination delivers the formats you route to it.
That means one job can, in a single run:
- render the report to Excel and PDF and PowerPoint at the same time, and
- email the PDF to controllers, drop the Excel on a network folder, and post a Slack notification,
without you building a separate job per format or per place. A common misconception is that each output format needs its own job. It does not. Select as many format tiles as you need, and route them where they belong. See Output formats.
The three decisions on the Distribution step#
| Decision | What you set | Where it is documented |
|---|---|---|
| What files | The output-format tiles (Excel, PDF, PowerPoint, CSV, Files) and each format's options. | Output formats |
| What they are called and where they land | The file-name pill editor and each destination's folder or path field. | Name and organize output files |
| Where they go | The destination tiles (Email, Network Folder, SharePoint, cloud drives, Slack, Teams, SFTP, IBM Planning Analytics). | Destinations |
Two more sidebars shape how the finished files are packaged and worded:
- Message templates let you write a branded, dynamic subject and body once and reuse it, so you are not editing the email by hand every week. The same editor is where an AI-generated insight is added to a message, and where recipient addresses can be read from the workbook instead of the address book. See Email messages and templates.
- Combine, collate, and zip group multiple outputs together, for example one email that carries a recipient's whole pack instead of five separate messages. See Combine emails, collate, and zip.
When files are generated versus when they are sent#
Generating a file and sending it are two separate stages. A report can render successfully and still send nothing, by design, in a few cases worth knowing up front:
- Hold for Delivery runs the job and previews the files but does not send them. The held files are kept so you can review and release them later from Activity. This is the safe way to check output before it reaches anyone.
- A destination only delivers the formats you routed to it. If a destination is left with no formats, it sends nothing even though generation succeeded.
- An exception check can act as a send gate for the whole report. If the report has an exception cell and its condition was not met, the send is suppressed for that run.
These are covered where you configure them, in Destinations and (for exception checks) in Worksheet output options.
Where this fits in the report lifecycle#
Distribution comes after you have chosen the source workbook and worksheets and parameterized the report, and before, or alongside, scheduling it to run on a cadence. Bursting decides how many copies a run produces and who each one is for; distribution decides what each copy is and where it goes.
Going deeper. To send a different copy to each store, entity, or recipient from one template, pair distribution with bursting. See What bursting is and when you need it.
Feedback on this page
Comments, questions, requests, or something missing or unclear? Email us - the page you are on is filled in for you.
Email feedback on this pageOr write to support@reportworq.com directly.