
Your first report, end to end#
This tutorial walks the shortest complete path in Reportworq: create a report, point it at a source workbook, choose the worksheets to output, and preview a finished file. The worked example is a monthly P&L pack built from a template workbook. By the end you will have a saved report and a downloadable preview file.
Keep the mental model from Key concepts in mind: a report is a template that makes outputs. Here you build the template and preview one output. Setting output formats, destinations, and schedules comes later and is linked at the end, so nothing in this tutorial is sent to a recipient.
Prerequisites#
- An account that can author reports, that is, an Author or an Administrator. Those accounts see the New control and the Job Editor; a User account does not.
- A report provider with at least one source file. A report provider is a configured location that holds source workbooks and templates. A new server ships with no sample content, so you will be pointing at your own source workbook. If no provider is configured, an administrator can set one up (see The integrations hub and Connect a data source).
- About 10 minutes.
Create the report#
On the Workspace, open the New control and select New Report.
Enter a name, for example
Monthly P&L pack, and select OK.The report appears in the Workspace list with 0 components.
On the new report's row, select the edit action.
The Job Editor opens. It has a six-step rail, Reports, Parameters, Bursting, Distribution, AI Profile, and Test, and starts on the Reports step. Because the report is empty, the step shows 0 reports, 0 sheets.
You will use only the Reports and Test steps in this tutorial.
Add a source workbook#
The Reports step is where a report is bound to the content it renders. Its own description states the model: "Source files and the worksheets they output, in order."
On the Reports step, select Add a Report.
The Select a Report dialog opens and browses the report provider as a folder tree with a file grid.
In the provider tree, open your report provider, then select the source workbook in the file grid.
Select OK.
The workbook is added to the report, and its worksheets appear as a checklist on the Reports step.
Choose the worksheets to output#
Each worksheet in the source workbook has an include checkbox. Included worksheets are rendered in the order they appear in the list.
Select the checkbox for each worksheet you want in the output. For a P&L pack, include the statement worksheet and its supporting tabs (for example, P&L Template, Data, and Lookups).
Clear the checkbox for any worksheet you want to leave out.
The step header updates to reflect the included worksheets, for example 1 report, 3 sheets.
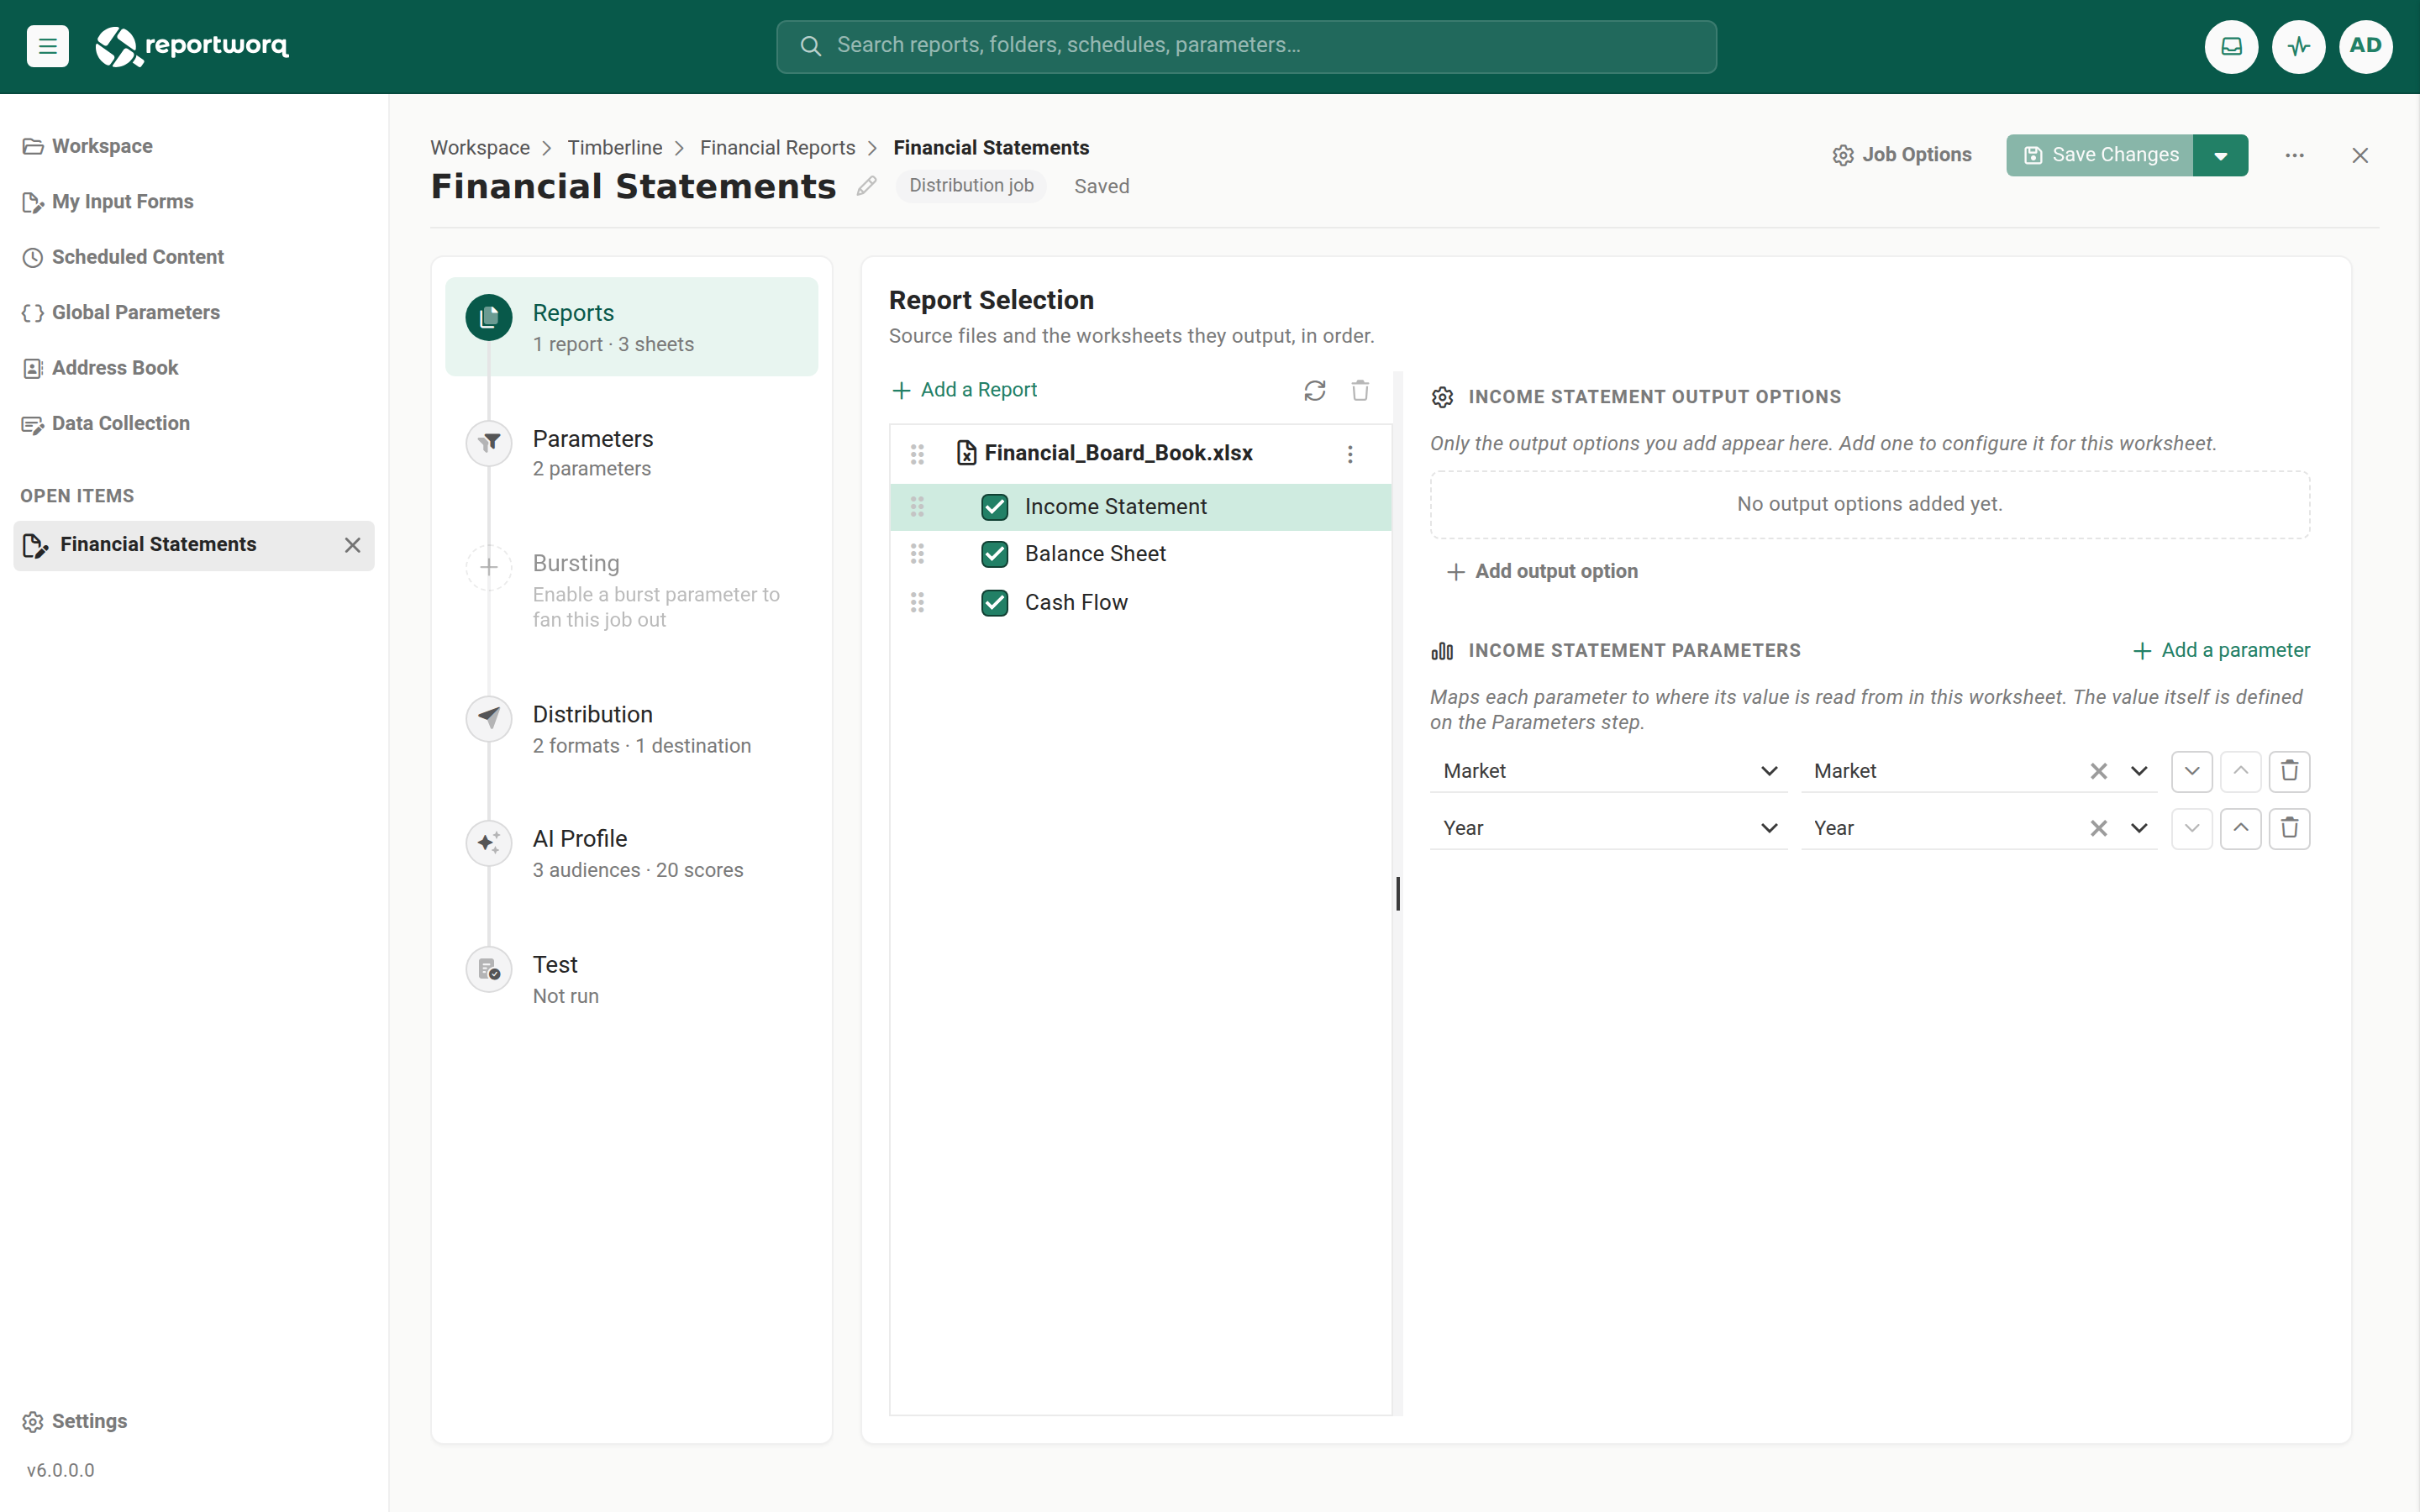
An excluded worksheet is dropped from the delivered file but still calculates during the run, so a hidden calculation or lookup tab can feed the visible sheets without appearing in the output. That is a deliberate technique, not a bug.
Preview the output#
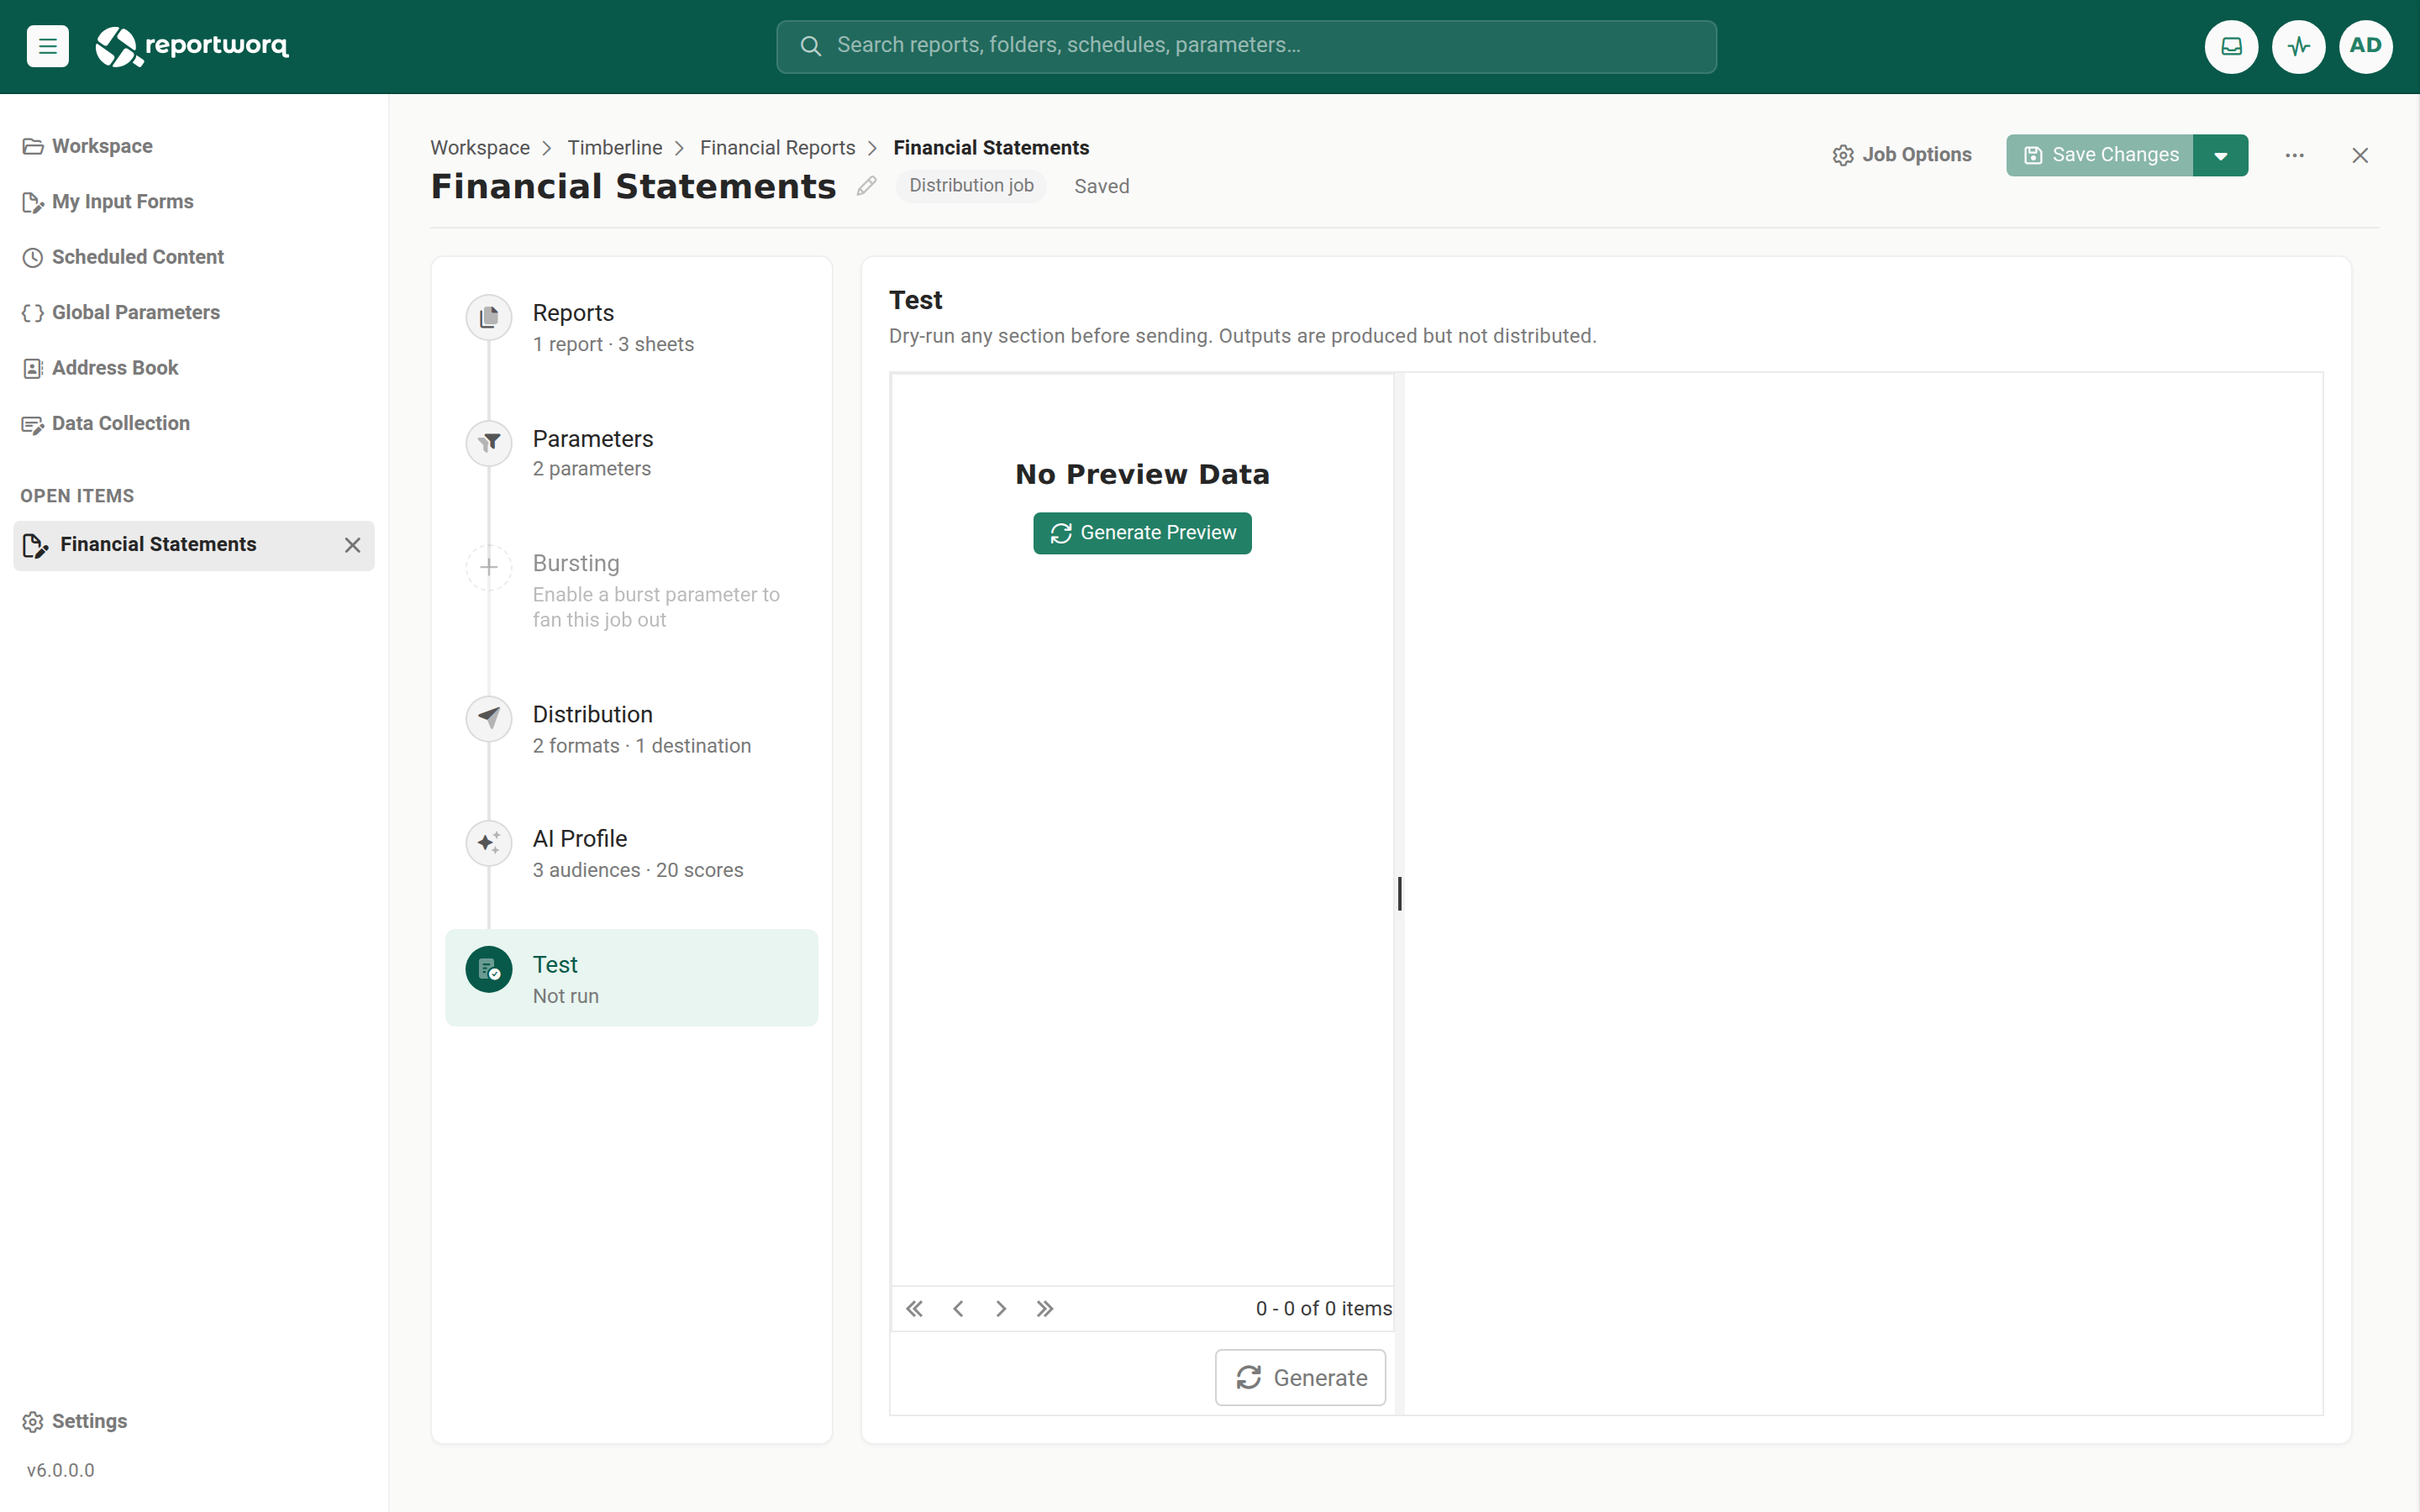
The Test step generates a preview through the same pipeline a production run uses, but with delivery suppressed. No file is emailed or written to a destination, so it is a safe way to confirm the report renders and the data resolves.
Go to the Test step.
Select Generate.
Reportworq builds one or more preview rows from the current configuration. The preview pane is a table of contents of the pages the report will produce, useful for checking sheet names and order before you run.
On a preview row, select Run Preview Job.
The row produces output. When the run finishes, it offers Download job file and Download log report.
Select Download job file to open your finished output, and Download log report to confirm the outcome. A successful run reports a datapoint summary such as Success - 1 datapoints, confirming the data resolved.
Save the report#
In the editor chrome at the top, select Save.
The report is saved and reusable. (Save is enabled only while the report has unsaved changes; adding the source workbook made it so.)
What to do next#
You now have a saved report and a preview file. From here, extend the same report:
- Drive it by period, entity, or store with Parameterize a report.
- Produce one personalized output per recipient with What bursting is and when you need it.
- Set output formats and delivery targets with Destinations.
- Run it on a recurring cadence with Schedule a job.
For a narrative view of that whole arc, see The report lifecycle.
Feedback on this page
Comments, questions, requests, or something missing or unclear? Email us - the page you are on is filled in for you.
Email feedback on this pageOr write to support@reportworq.com directly.